


We are super excited to launch this long-awaited feature! We have finally launched the post approval feature that allows your team to ask an internal team member or a client for approval. Post Approval is available on our Premier, Agency, and Enterprise plans.Let's dive in.Let's say I want to write a social media post and get my co-worker Dan to approve it. Here is how I would go about doing just that withPost Approval.
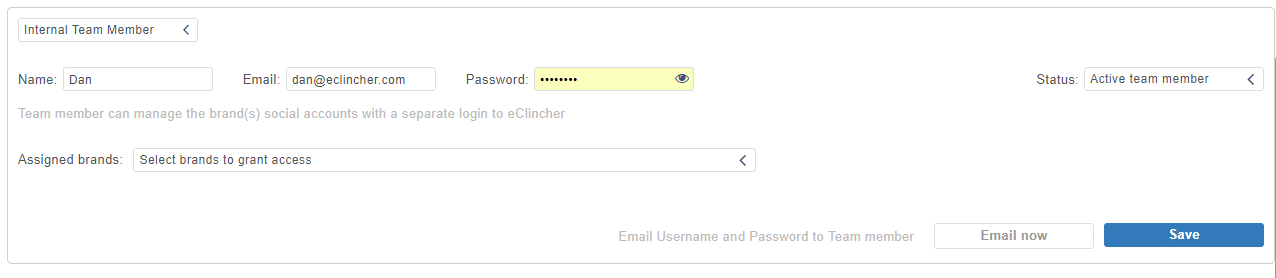
First, you need to create a new team member and make sure that your co-workers or fellow social media managers can approve the posts. You can either create an internal or external team member.Here is the difference: Internal team member - someone that works on your team and can view the entire eClincher interface.External team member - someone like your client that can only view the post that needs to be approved, through a special link (white label option is available soon as well).
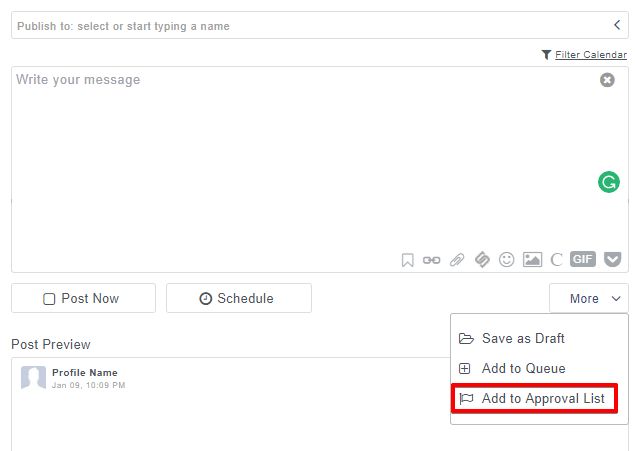
Write the post like you would normally do it. When you are done simply click on "more" and select "add to approval list".
And then to see all of your posts on thePost Approval list that need reviewing, simply click on the tab shown below:
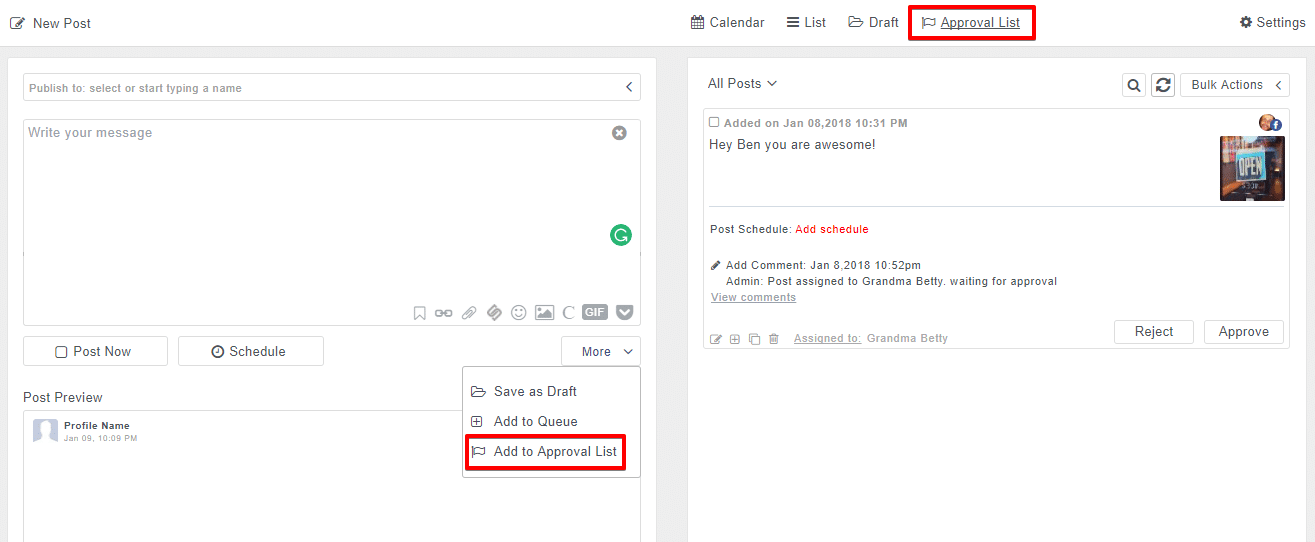
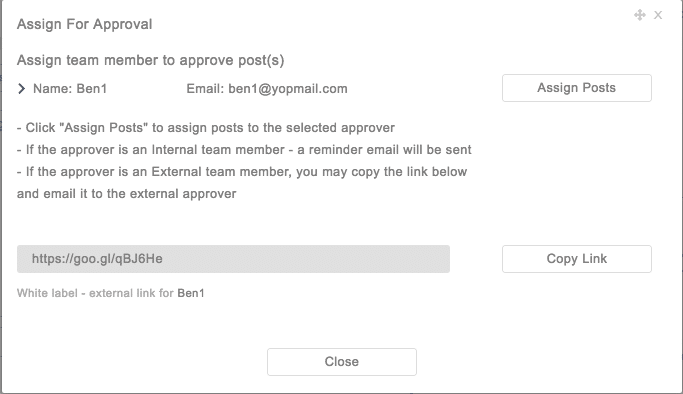
Now that you have added the post to the Post Approval list, you can actually see it there. When you click on publishing you will see a tab that is called Approval List. Click on that and you will see all the posts that you have sent to get approved.Select a post you like and click on "assigned to" in order to assign it to a team member. If you assign it to an internal team member (co-worker) then they will be able to see your post on their list in the drop down menu below:
If you want to assign the post to an external team member (consultant or client) then you will see a link on your screen that you would need to share with them.
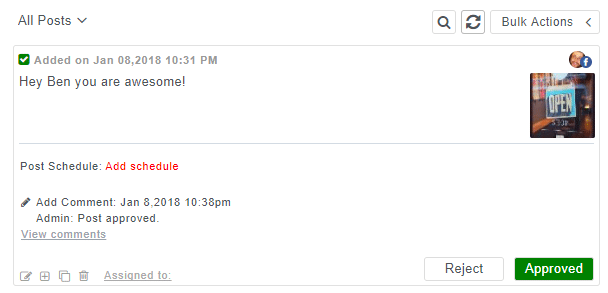
You can do a lot of iterations here. You can approve, comment, or reject a post. Only posts that are scheduled properly (that have a date and a designated social media profile assigned to them) will get on the schedule. Incomplete posts will remain in the approval mode.If your team member approves the post the green button lights up and you can go ahead and schedule it to go live.
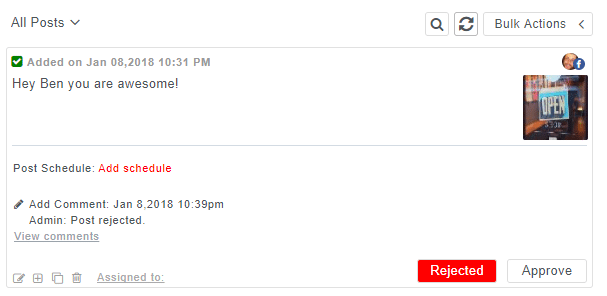
If they reject the post the button turns red.
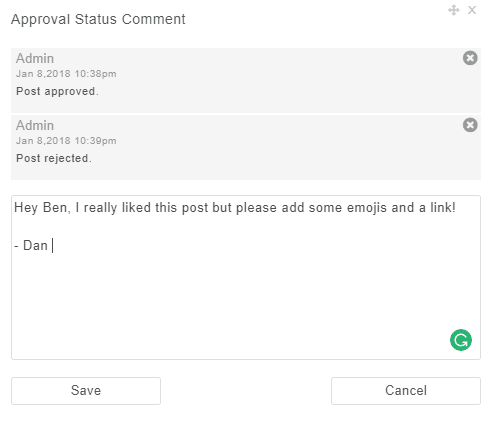
Easy enough?That's not it. Your co-worker needs to voice their concerns if they reject the post. They can simply click on "view comments" and add a comment like so:
Next, the admin of the post can go in and edit the post and make all the changes that were requested. Click on the post itself and edit it like you would normally do.
Then, click to add to approval list again, like you did the first time.
Once the co-worker approves the post you can log in and get it scheduled. You will be able to see it in the calendar.And that's all there is to it!
They sure can.Make sure to add an "external team member", which could be anyone outside of your own organization or social media team. This could be a client, consultant, or even grandma Betty (if she's tech savvy)
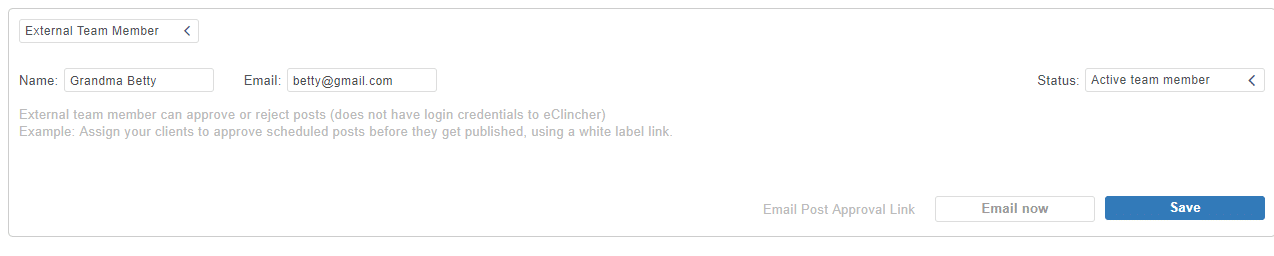
Once the post is assigned to that external team member they actually get sent a link that only displays that post. Here is what it looks like:

And the actual post-approval link displays this:
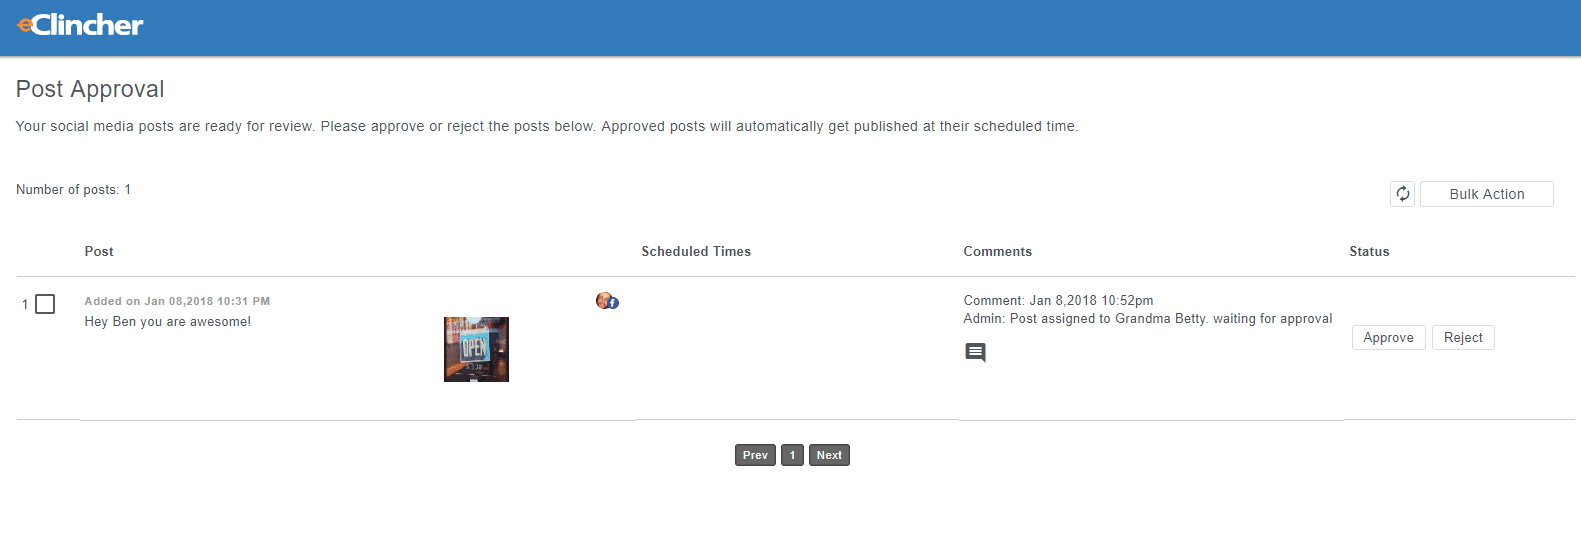
Each external team member gets their own special link that displays all of the posts that demand their attention. They can approve, reject, and comment on any post they wish. As soon as the post is approved it will disappear from the external client interface (rejected posts remain there until they are approved).We hope you enjoy this awesome feature.Cheers!the eClincher Team

Effortlessly control multiple social media platforms using our AI-driven tools that automate posting, scheduling, and content optimization.
.svg)


