


.png)
%20(1).png)
.png)


.svg)
.svg)
.svg)

.png)
.png)
.png)
.svg)
.svg)
%20(1).png)
.svg)
.png)


.png)
.svg)
.svg)
.svg)

%20(1).png)
.png)
.png)

.png)
.png)
.svg)
.svg)
%20(1).png)
%20(1).png)
.png)


%201296x600px.png)
Eclincher vs Agorapulse: Head-to-Head (2026)
Facebook is the biggest social media platform, with 3 billion people using it monthly. If you're running a business and don't have a Facebook business page, you're missing out on the chance to connect with all these users.
A Facebook page for your business is key to any marketing plan on the platform. It's where you can tell people about your company and show off new products. It lets you help out your customers when they need it.
In this guide, we'll walk you through what a Facebook business page is, how it can help you reach your target audience, and the step-by-step process to make your page engaging. We'll also give you some extra tips on setting things up so you get the most out of your page.
What is a Facebook Business Page and What Can You Do With it?
A Facebook business page is like a unique profile for companies or brands on Facebook, different from a personal profile just for one person. It's all about business, showing off what you sell or do, and sharing content that people who like your business might enjoy.
Starting a business page on Facebook is smart if you want to spread the word about your business online. As of mid-2023, Facebook has about three billion people using it monthly, making it the top social network worldwide. With the right approach, you could reach many potential customers on Facebook and help your business grow.
Here's what you can do with a Facebook business page:
- Share content that's both useful and fun for your audience.
- Talk about events you're hosting.
- Learn more about the people you're selling to.
- Offer your products or services.
- Create a community space with a group for your fans.
- Drive people to your website.
- Launch and track paid Facebook ads.
- Look after more than one page using a single admin account.
- Also, manage an Instagram account.
These strategies, primarily focusing on Facebook targeting and creating an engaging Facebook business page, can make a difference in connecting with your audience and boosting your online presence.
How to Create the Perfect Facebook Business Page?
To create the perfect Facebook Business Page, start by filling it with clear, engaging information about your business and use high-quality images for your profile and cover photos.
Then, regularly update your page with content that resonates with your audience to keep them engaged. Just follow these easy steps to begin.
Step 1: Choose or Create A Personal Facebook Account
Facebook business pages are different from your personal Facebook profile. They must be managed by someone's personal account, the Page administrator. You can have more than one person managing the page.
You can use your existing personal Facebook account, or if you prefer to keep your work and personal life separate, you can make a new account using your work email.
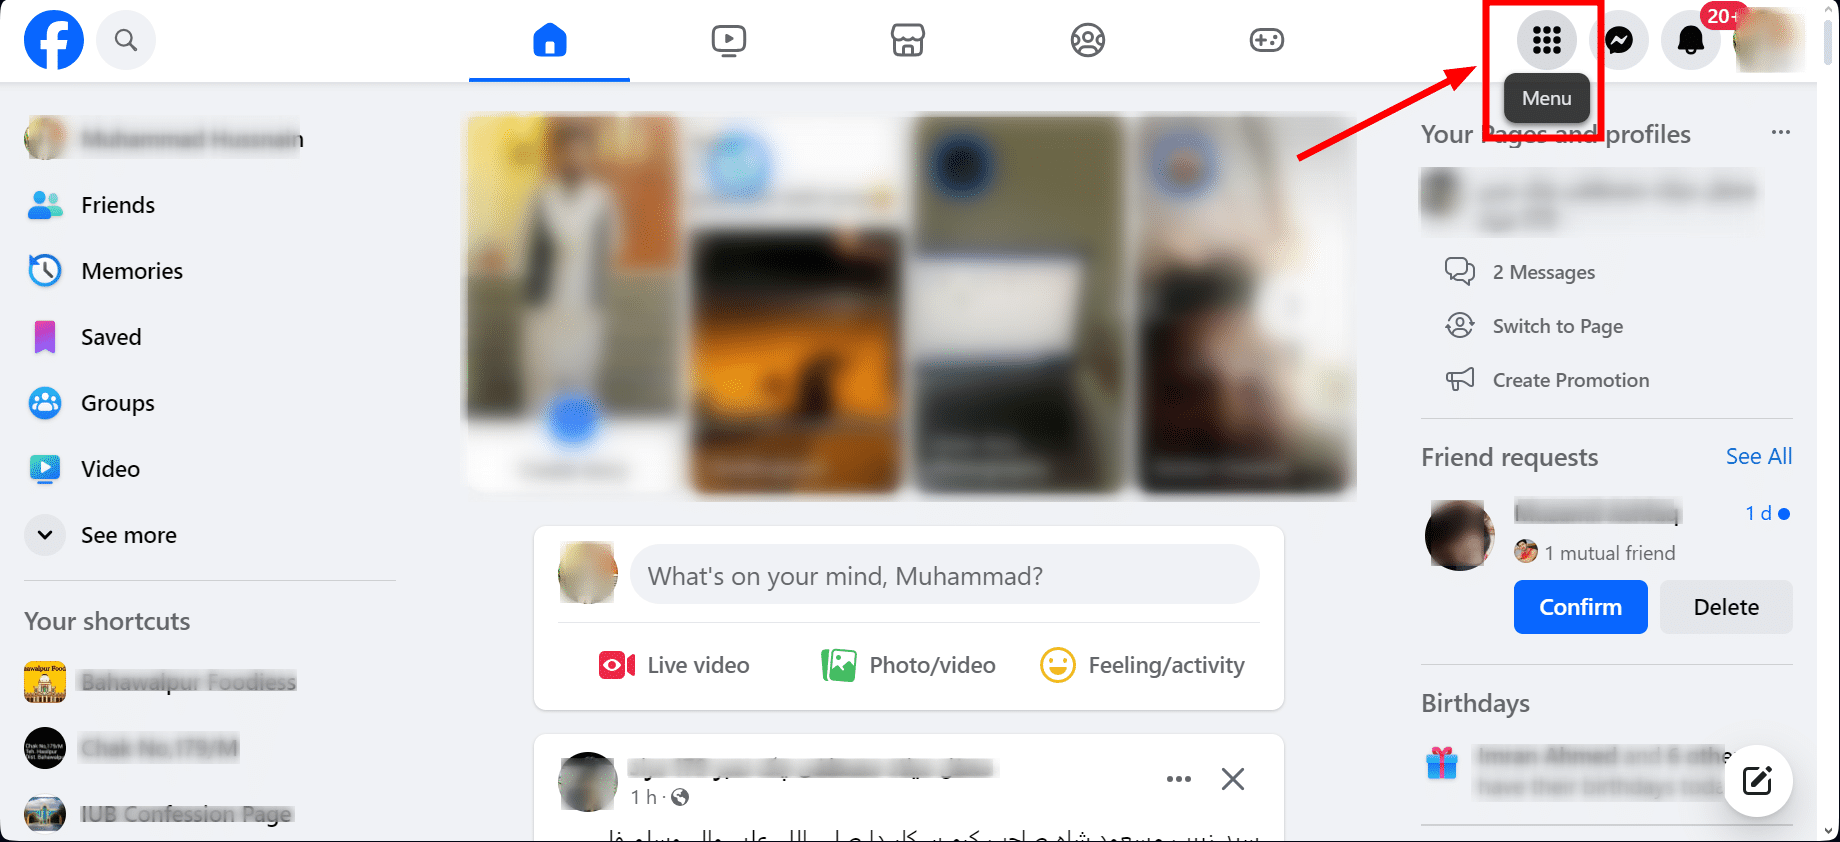
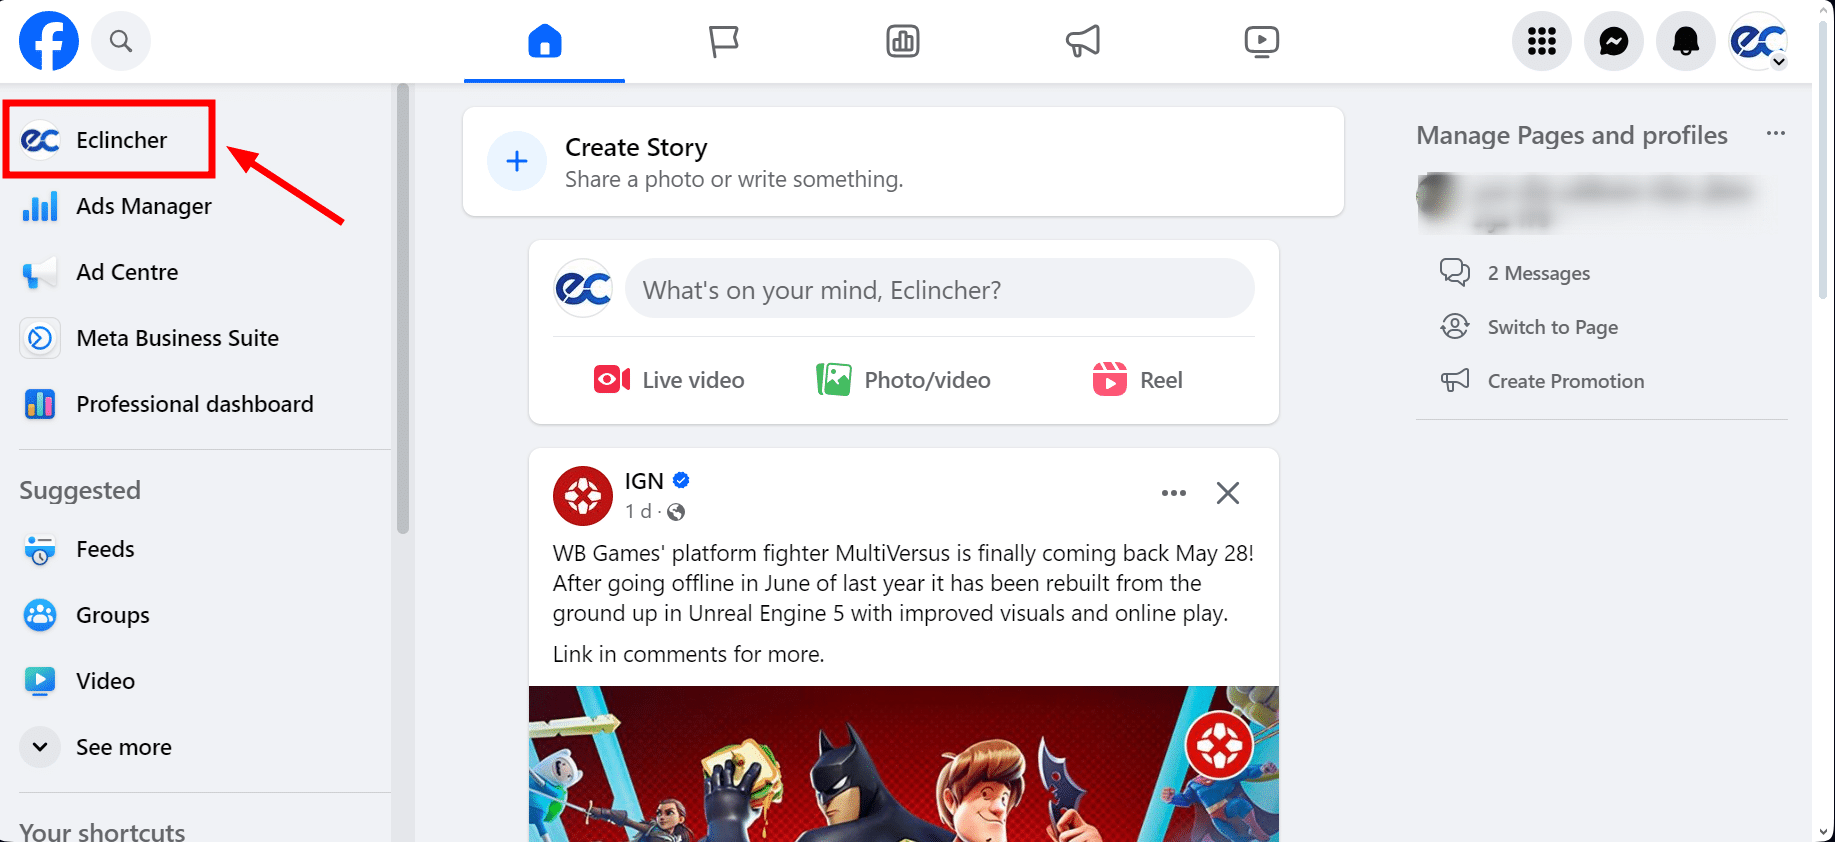
- Log in to continue with the account you've decided to use, head over to the Facebook homepage, and then click on the "Menu" that looks like a dotted box.
- Next, click on "Page."

Step 2: Fill in Your Business Information
On the "Page" menu, click on the "Create a Page" option. When you reach the "Create a Page" display, follow the simple steps and add your info. As you fill in the boxes on the left side, you'll see how your page will look on the right. You'll need to fill out the following information:
Page Name
First up, type in the name of your page.
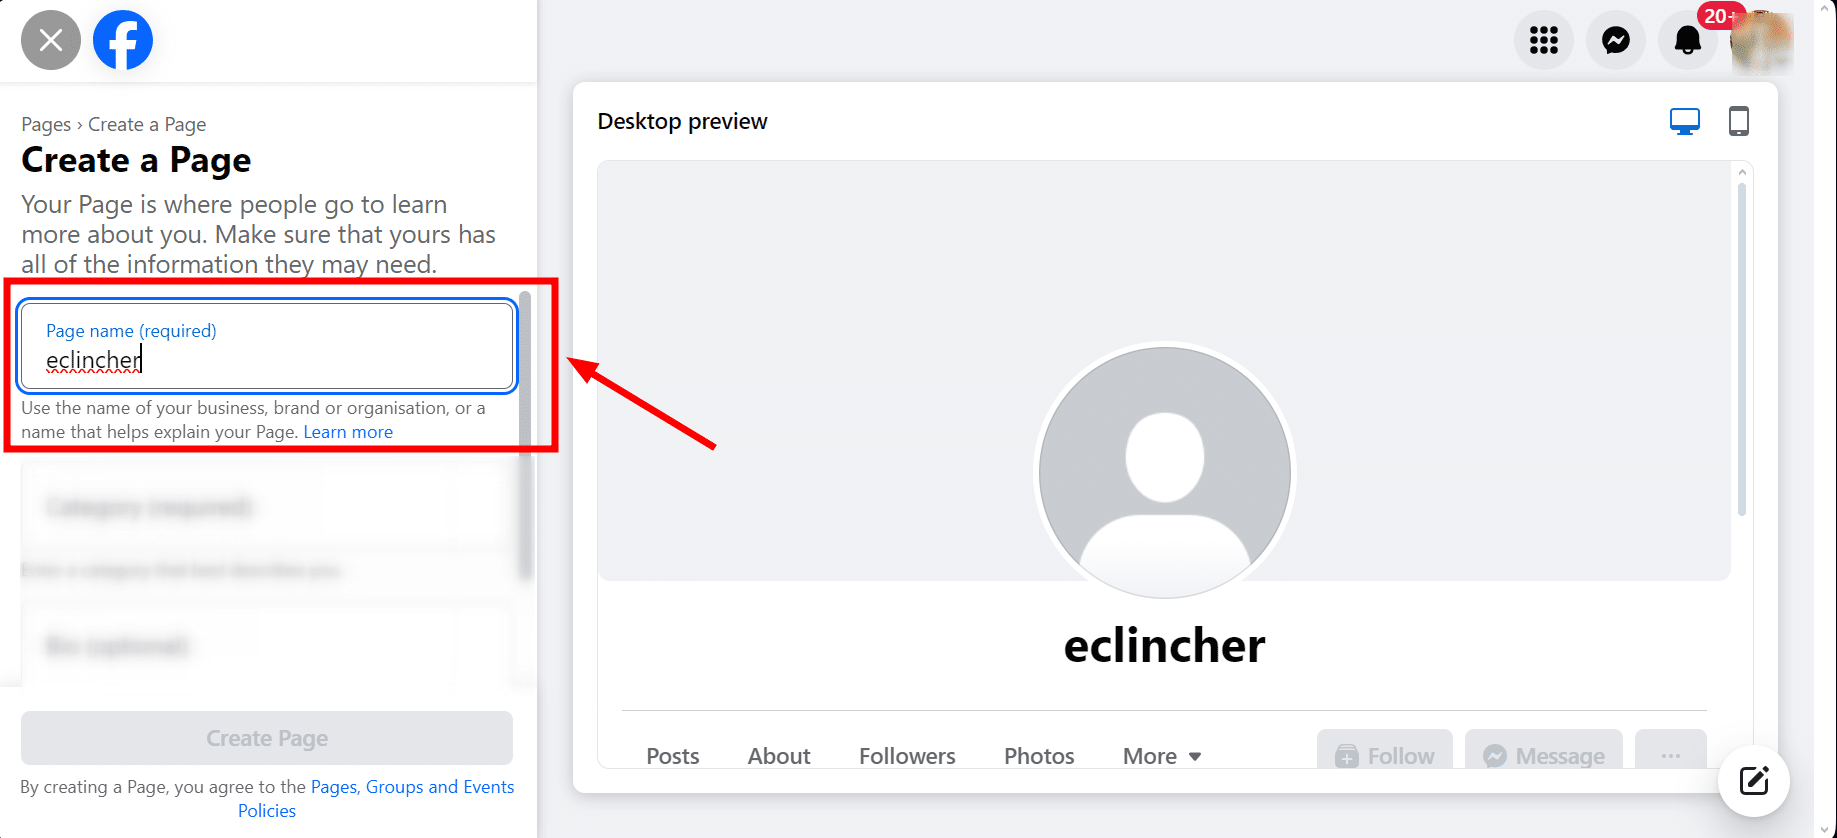
This is the name people will see when they find your page or see your comments on posts. Use your business's real name or something easy for people to search for. You don't have to use your full, formal business name if it includes "LLC."
Category
Pick up to three categories that describe what your business does.
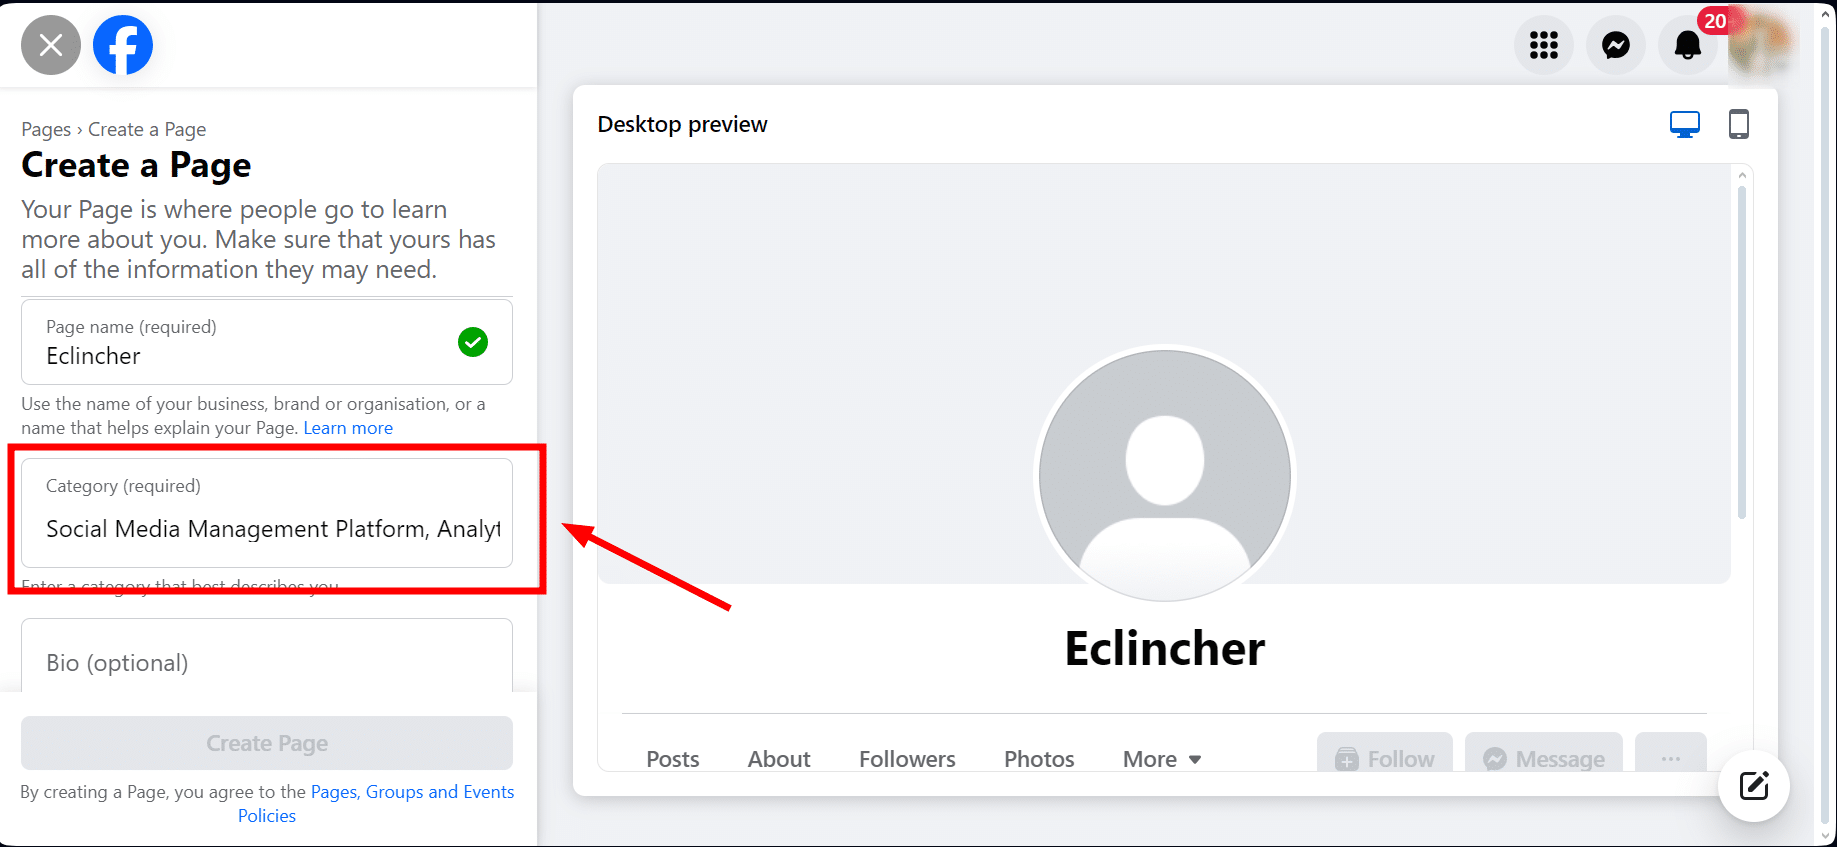
This helps Facebook show your page to people looking for businesses like yours. As you start typing, Facebook will suggest options for you.
Business Description
Here, you have 255 characters to talk about your business briefly.
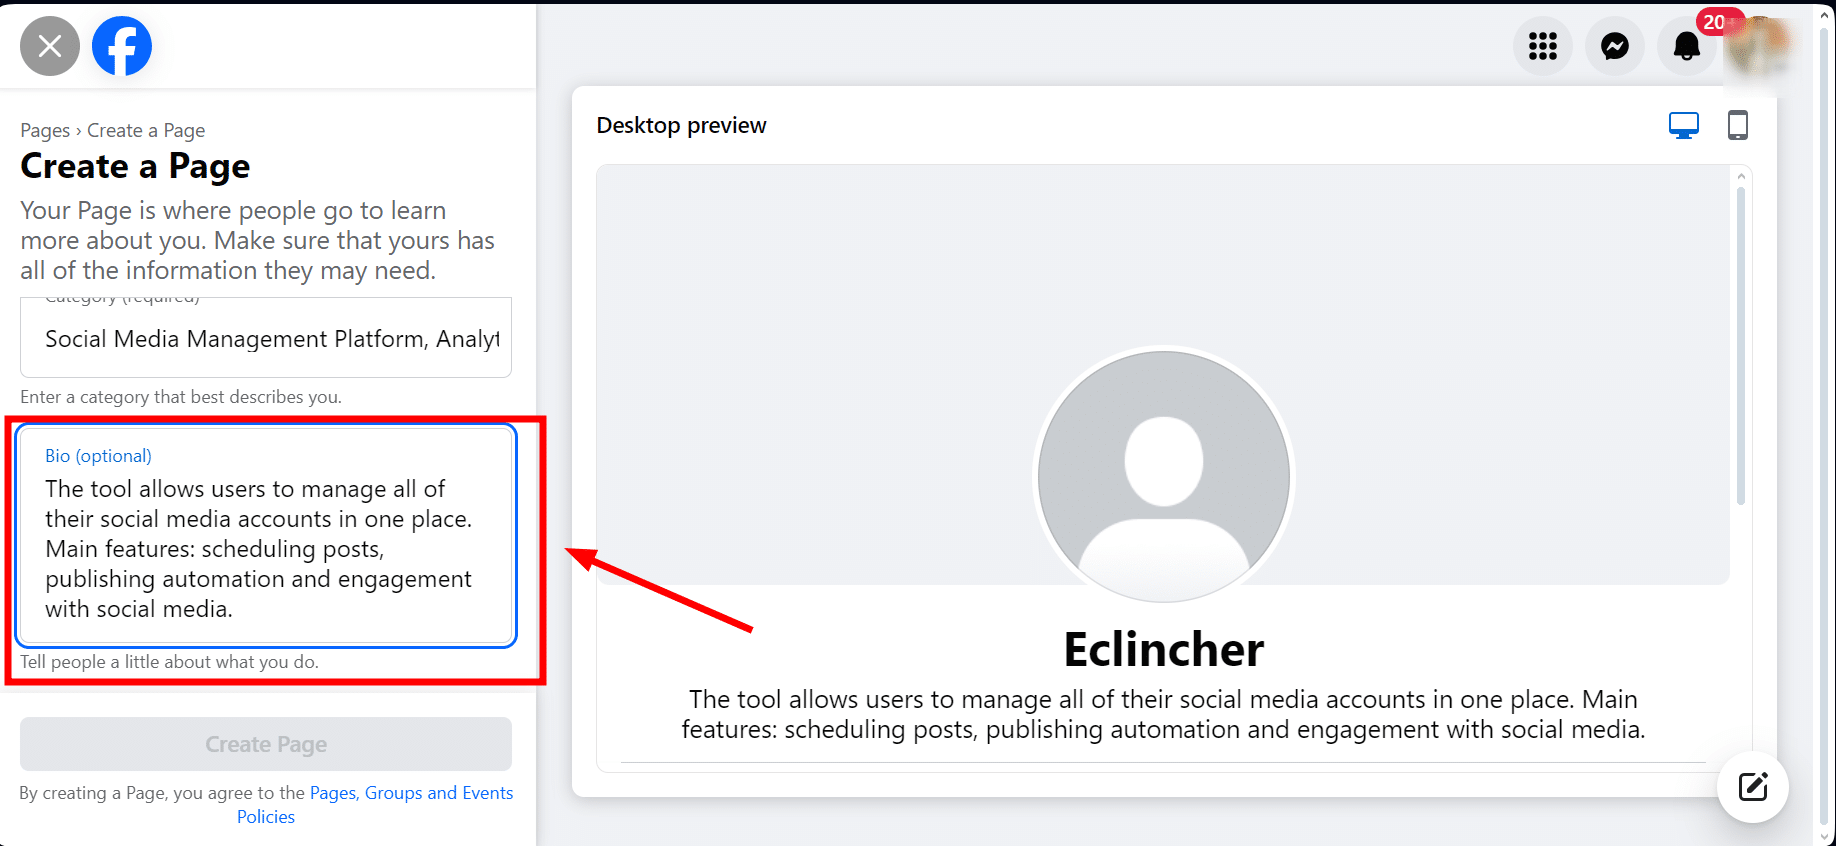
Focus on the most crucial info and what makes your business stand out. These few sentences will show up in search results.
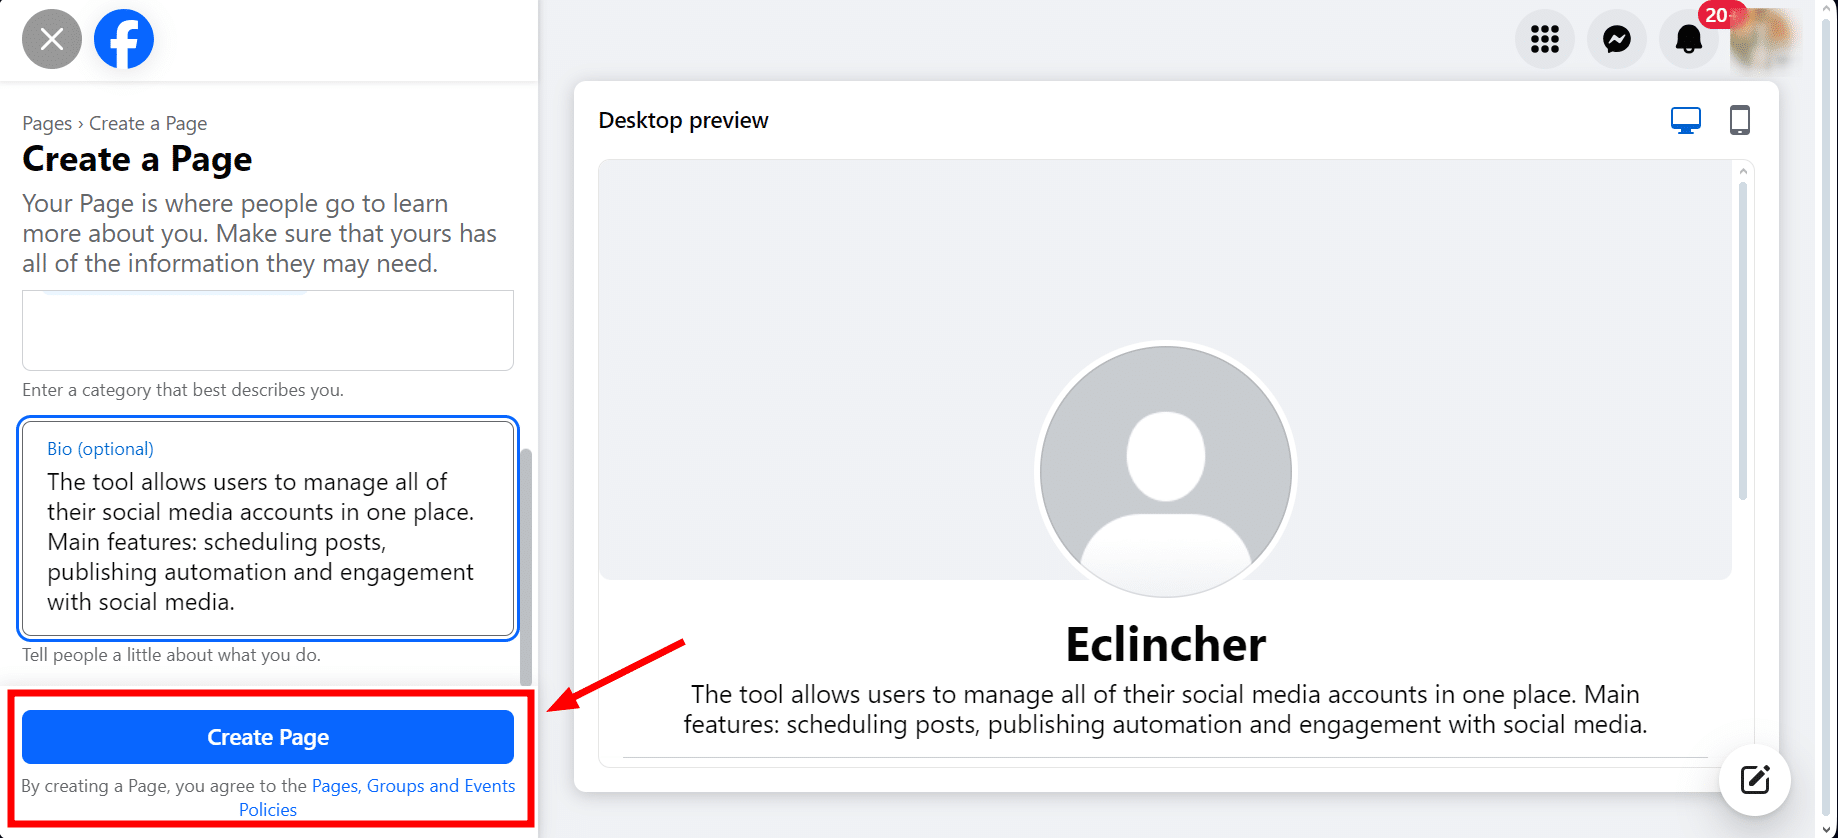
After entering all your information, hit the "Create Page" button.
Next, you'll add more about your business, such as:
- Website: Enter the business's website URL here. This makes it easy for visitors to click through to your site for more information.
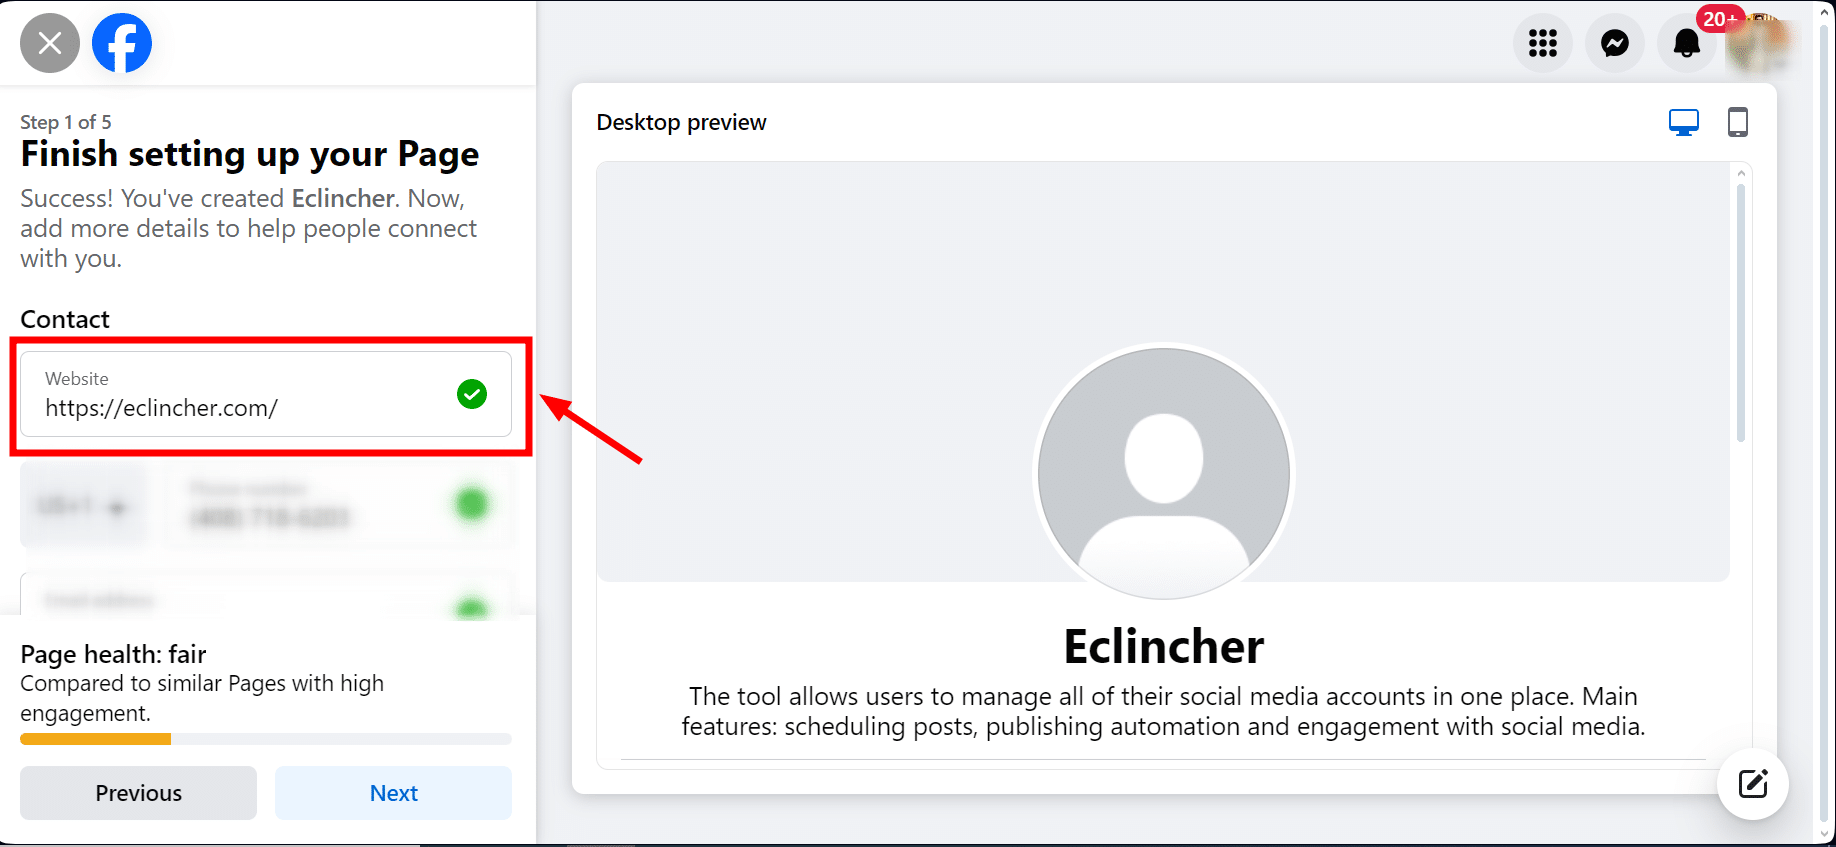
- Phone Number: Share your business's phone number (contact details). This lets customers call you directly if they have questions or need assistance.
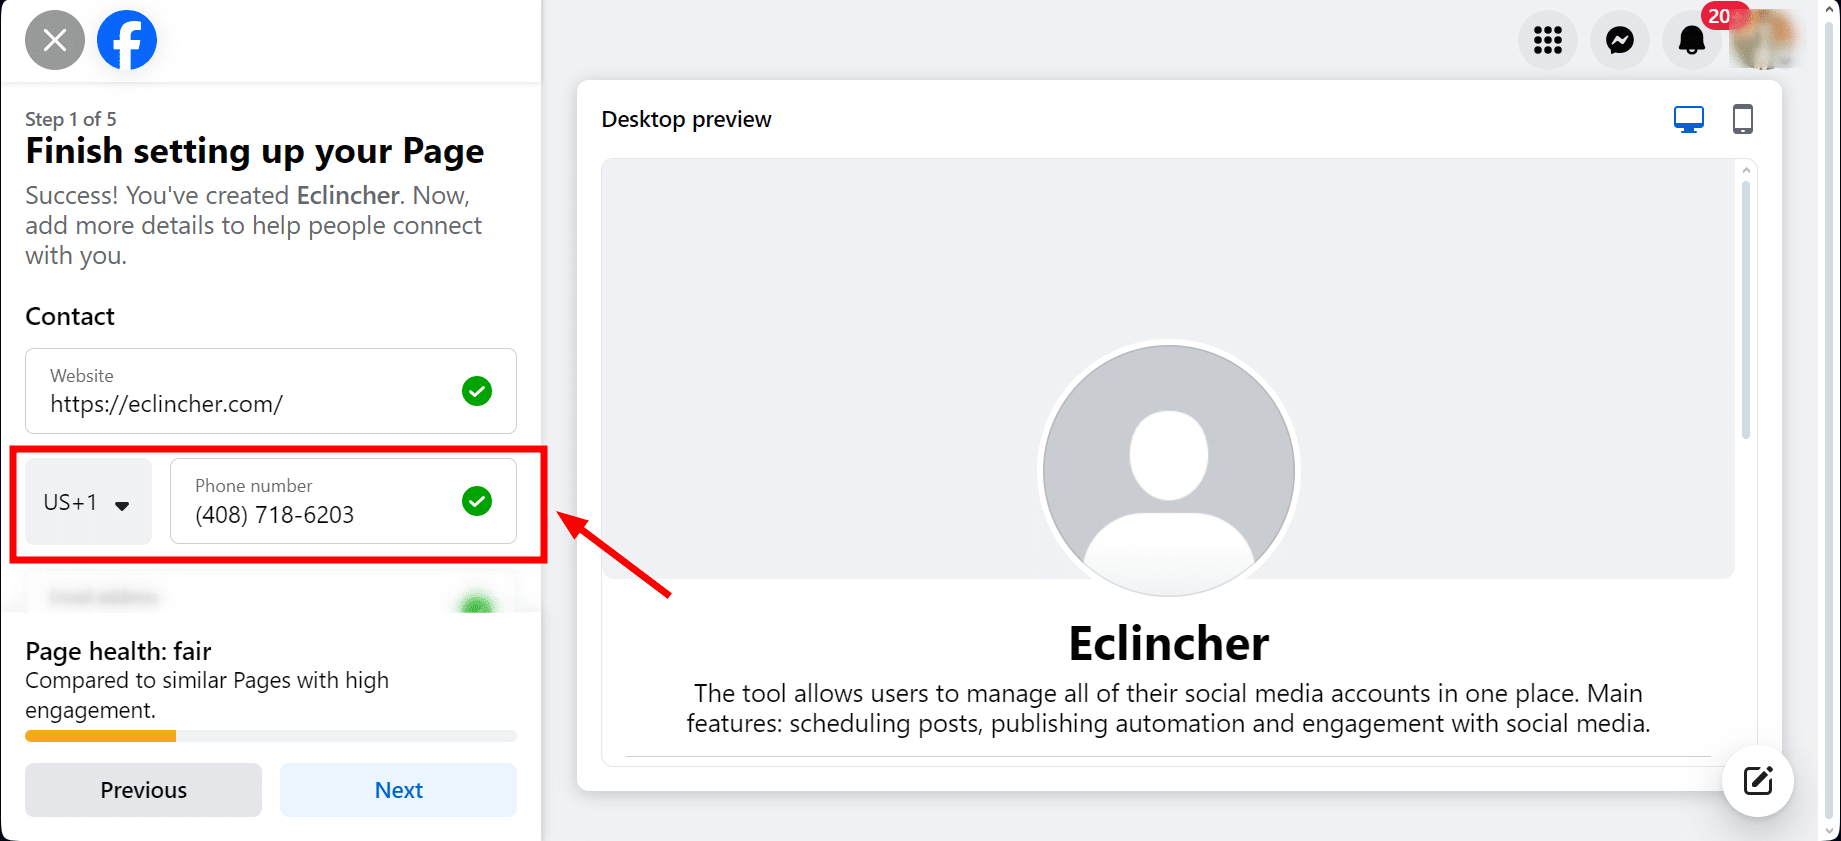
- Email Address: Provide an email address where customers or potential clients can send inquiries or ask for help.

- Location: Enter the physical address of your business. This helps people know where they can find you.
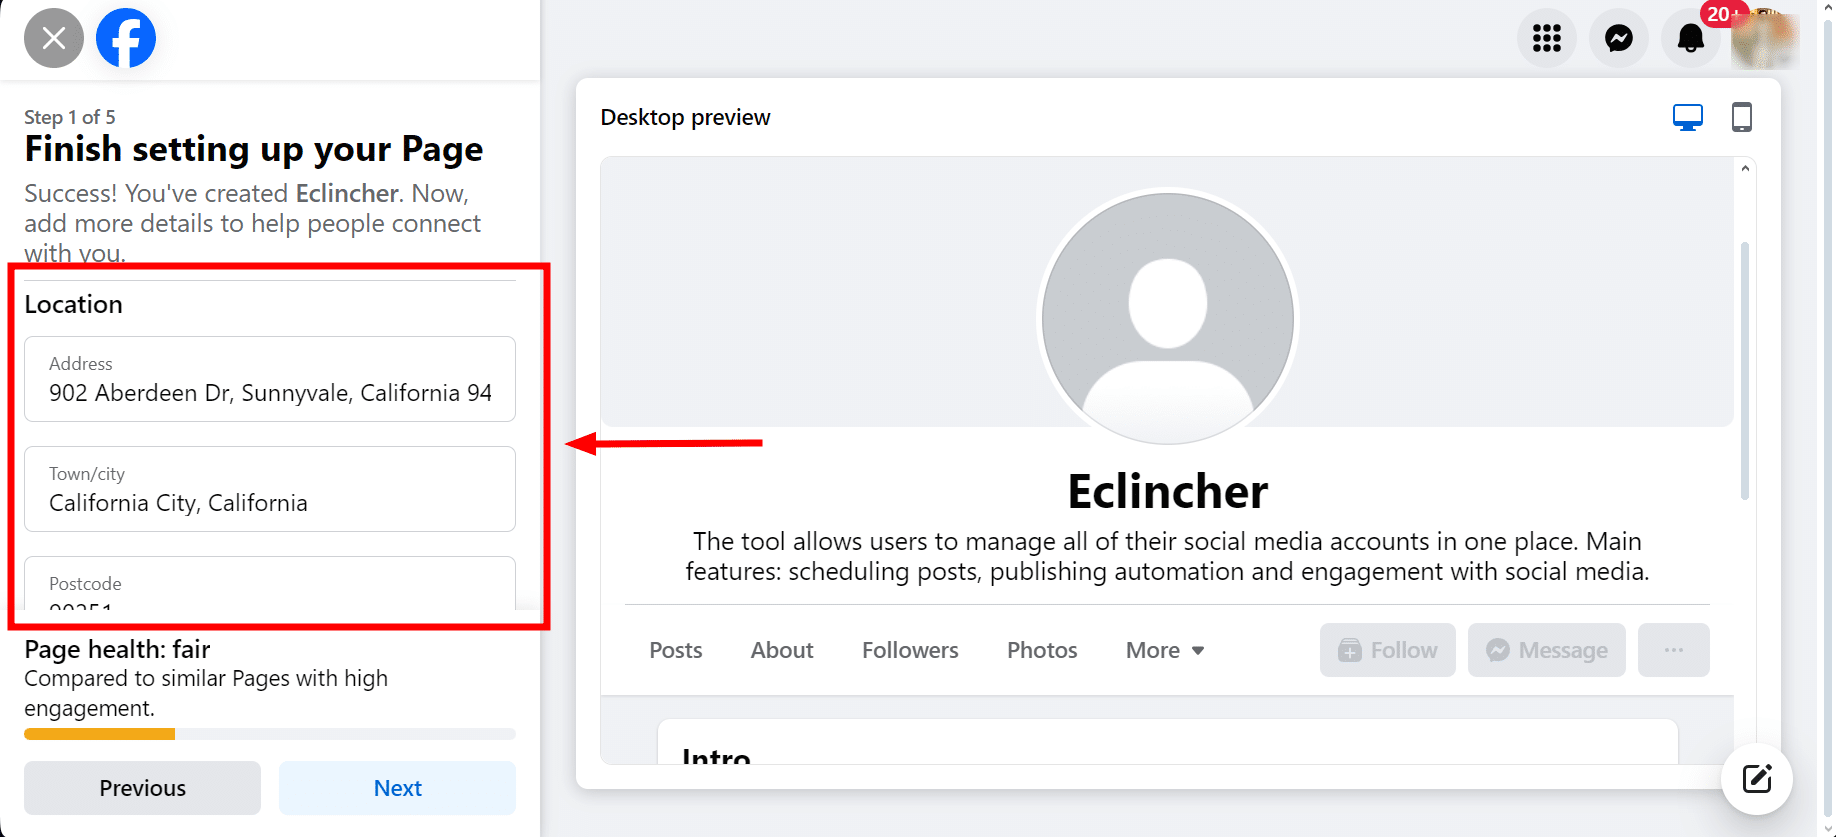
- Hours: List the operating hours during which your business is available. This information is crucial for customers planning to contact you.

Once you've filled in these details, click on "Next."
Pro Tip: It's a good idea to see how your page looks on a mobile because 98.5% of Facebook users in 2023 used their phones to visit the site. Making sure your page looks good on mobile is essential.
Step 3: Add a Profile Photo and Cover Photo
Picking the right size for your social media pictures is crucial. They might look blurry or not fit right if they're not the correct size. Here are the sizes you should use:
Add a Profile Picture (170 x 170 pixels)

This picture shows up next to your content in people's News Feeds and when you comment on other posts. It's best to use your company logo here. Even though you'll upload a square picture, Facebook changes it to a circle in some places, so make sure there's some space around your logo so it doesn't get cut off.
Cover Photo (820 x 462 pixels)
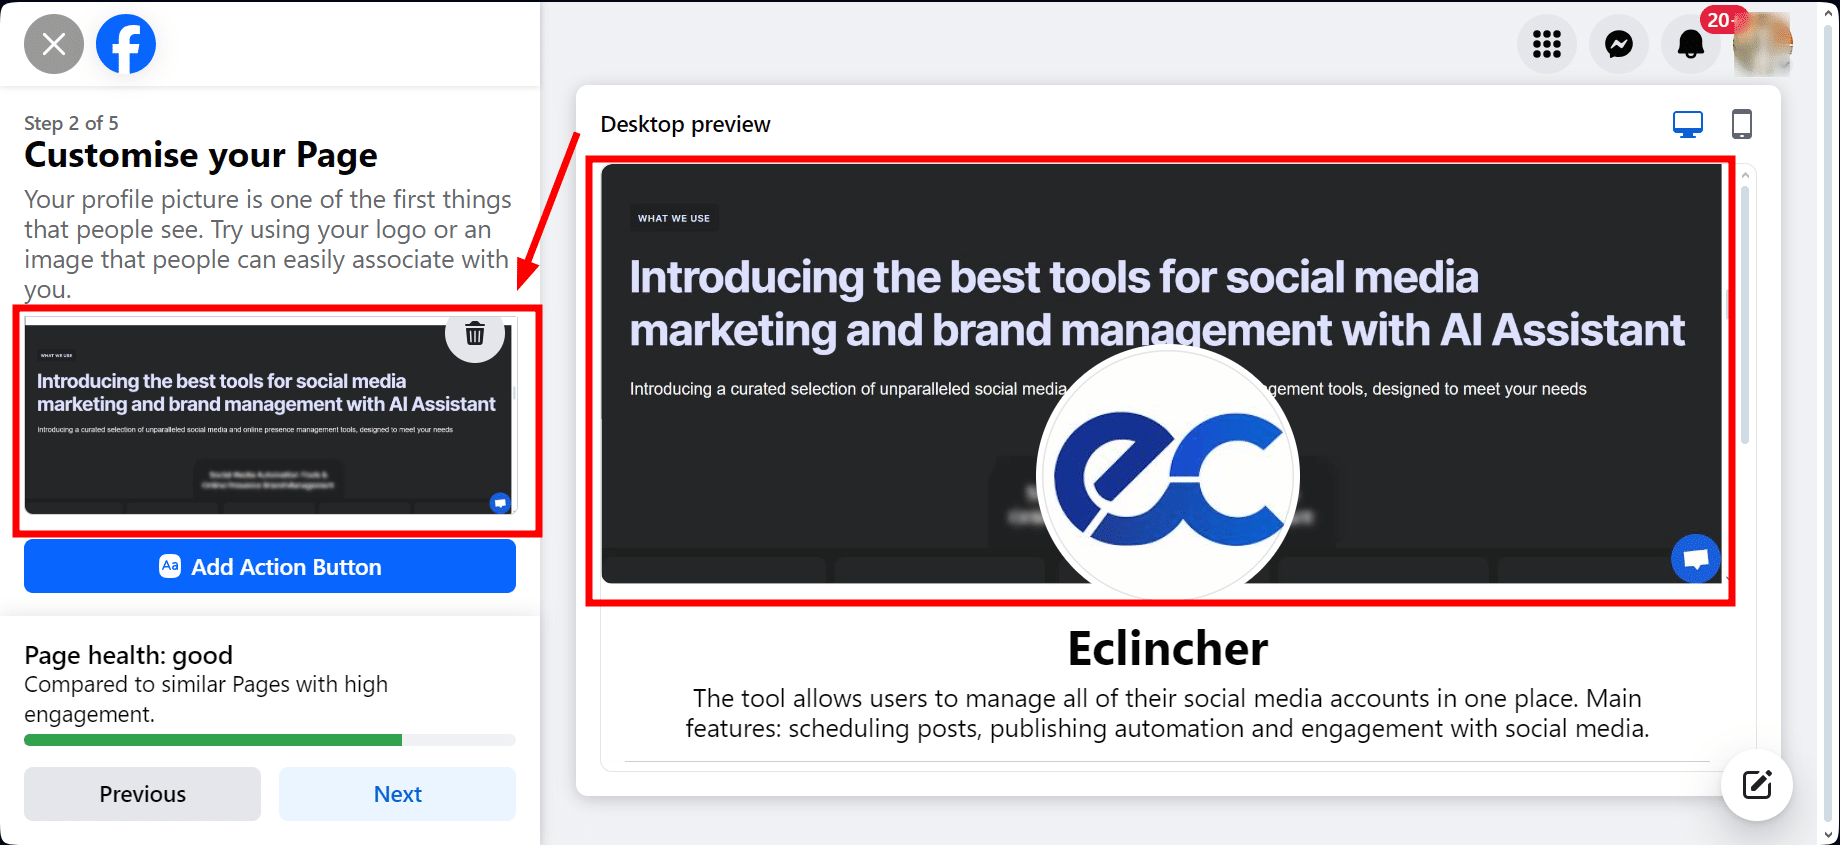
This large photo stretches across the top of your page and is a chance to catch people's attention with a picture representing your brand well.
Facebook shows your cover photo differently on computers and phones—820 pixels wide by 312 pixels tall on computers and 640 pixels wide by 360 pixels tall on phones. Using a size of 820 by 462 pixels usually looks good on both.
Note: Keep the most important parts of your picture in the middle, so nothing important gets cut off, no matter where it's viewed.
After adding your profile and cover photos, click "Next" to keep going.
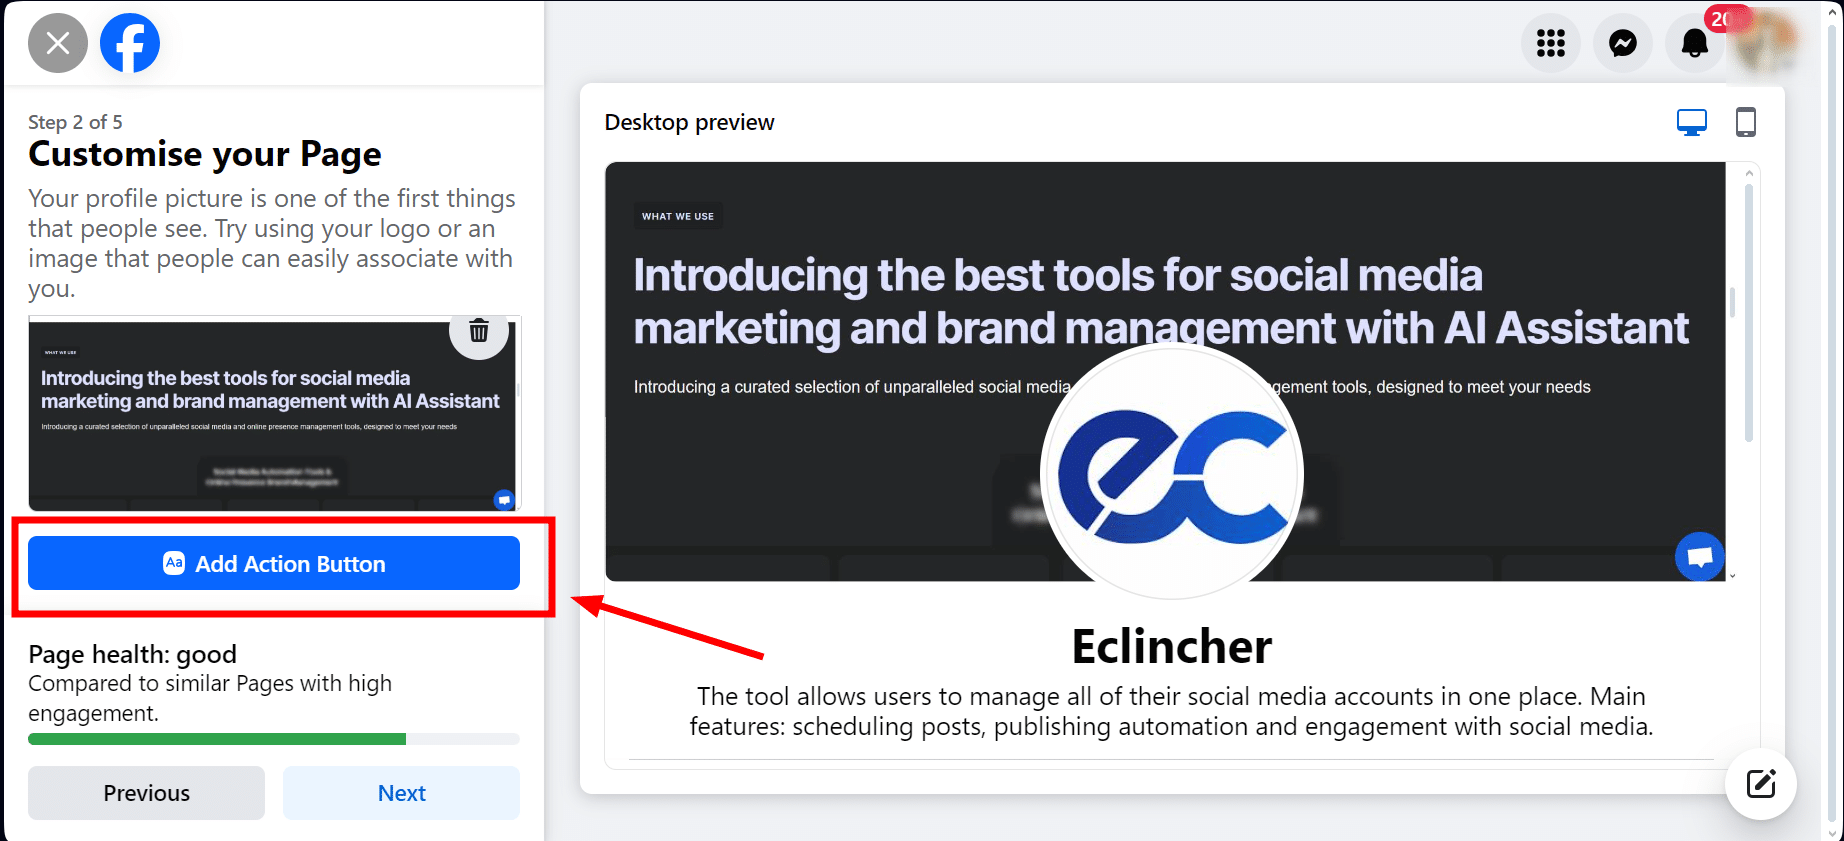
Step 4: Add an Action Button
An action button acts as a special link right under your cover photo that encourages visitors to do something specific, like visit a webpage, book a time with you, or reach out directly, among other actions.
Choosing the right action button can really help turn people visiting your Facebook Business Page into customers. Here's how you can add one:
- From your Page, click on "Add An Action Button."
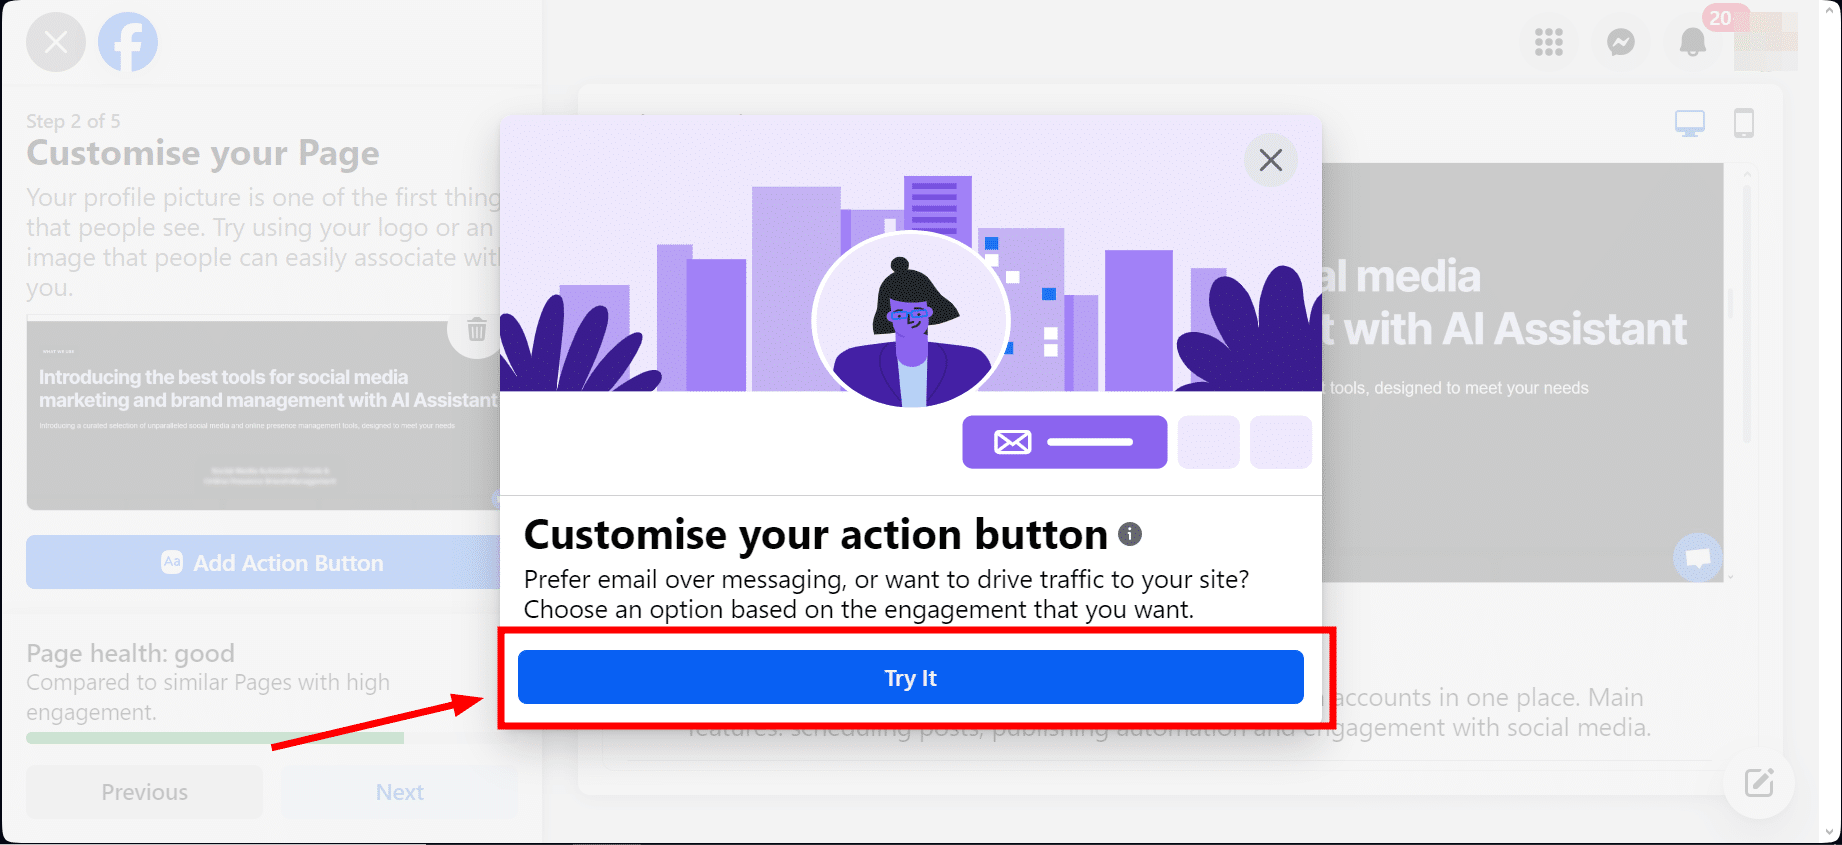
- A prompt will pop up; click "Try it" to proceed.
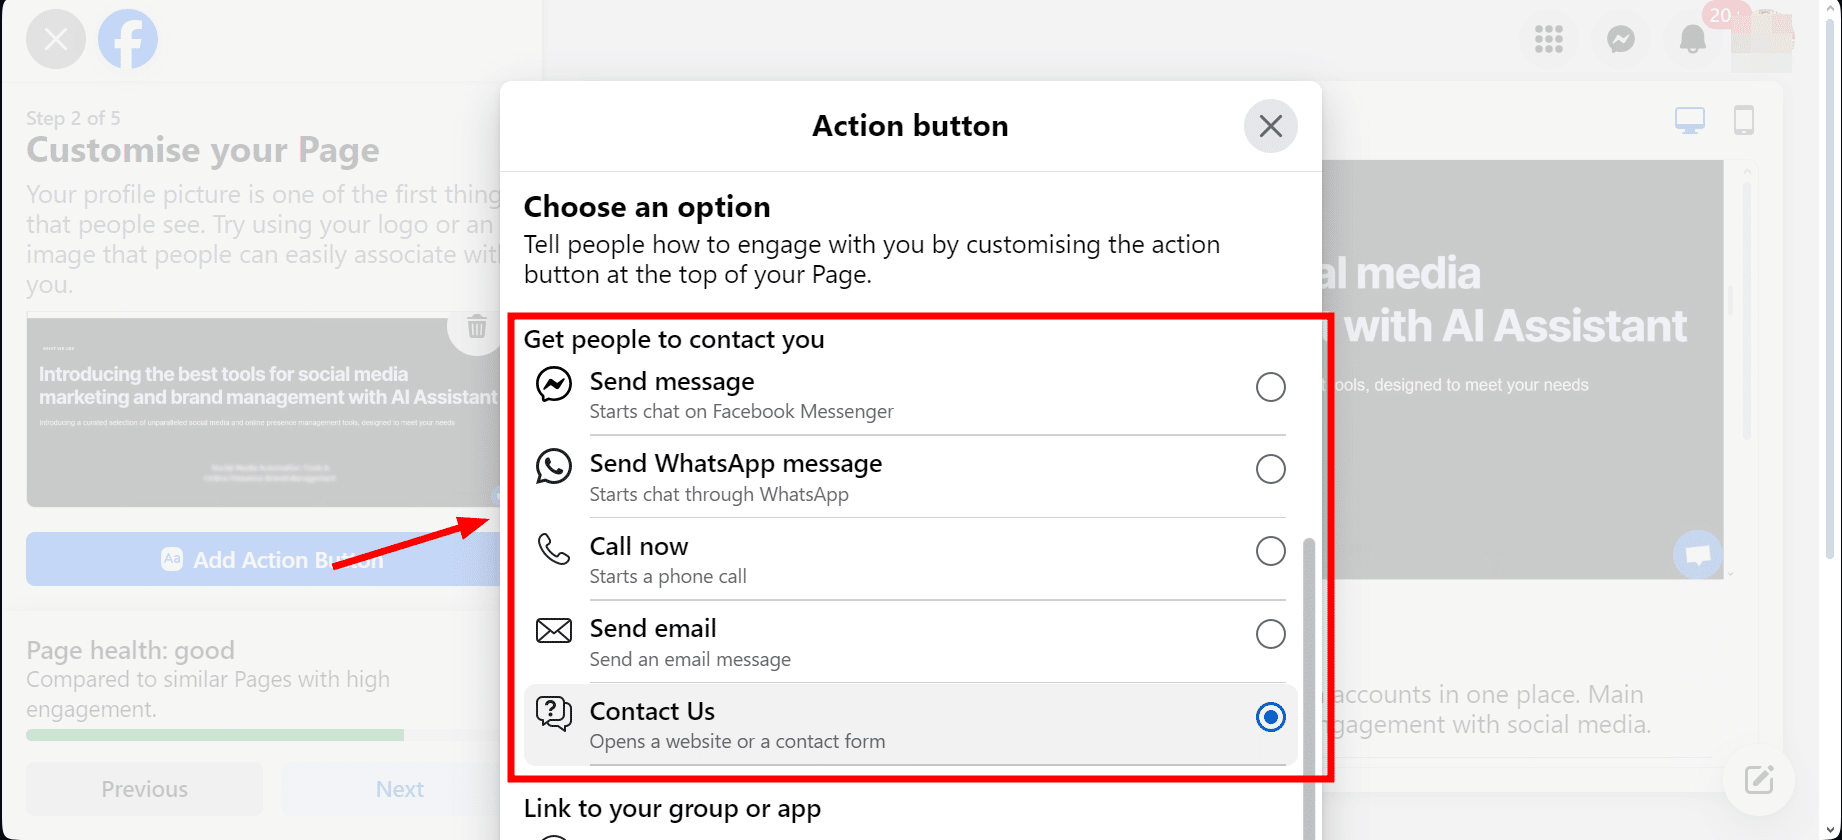
- You'll see a list of different buttons. Pick the one that fits what you want visitors to do, then click "Next."
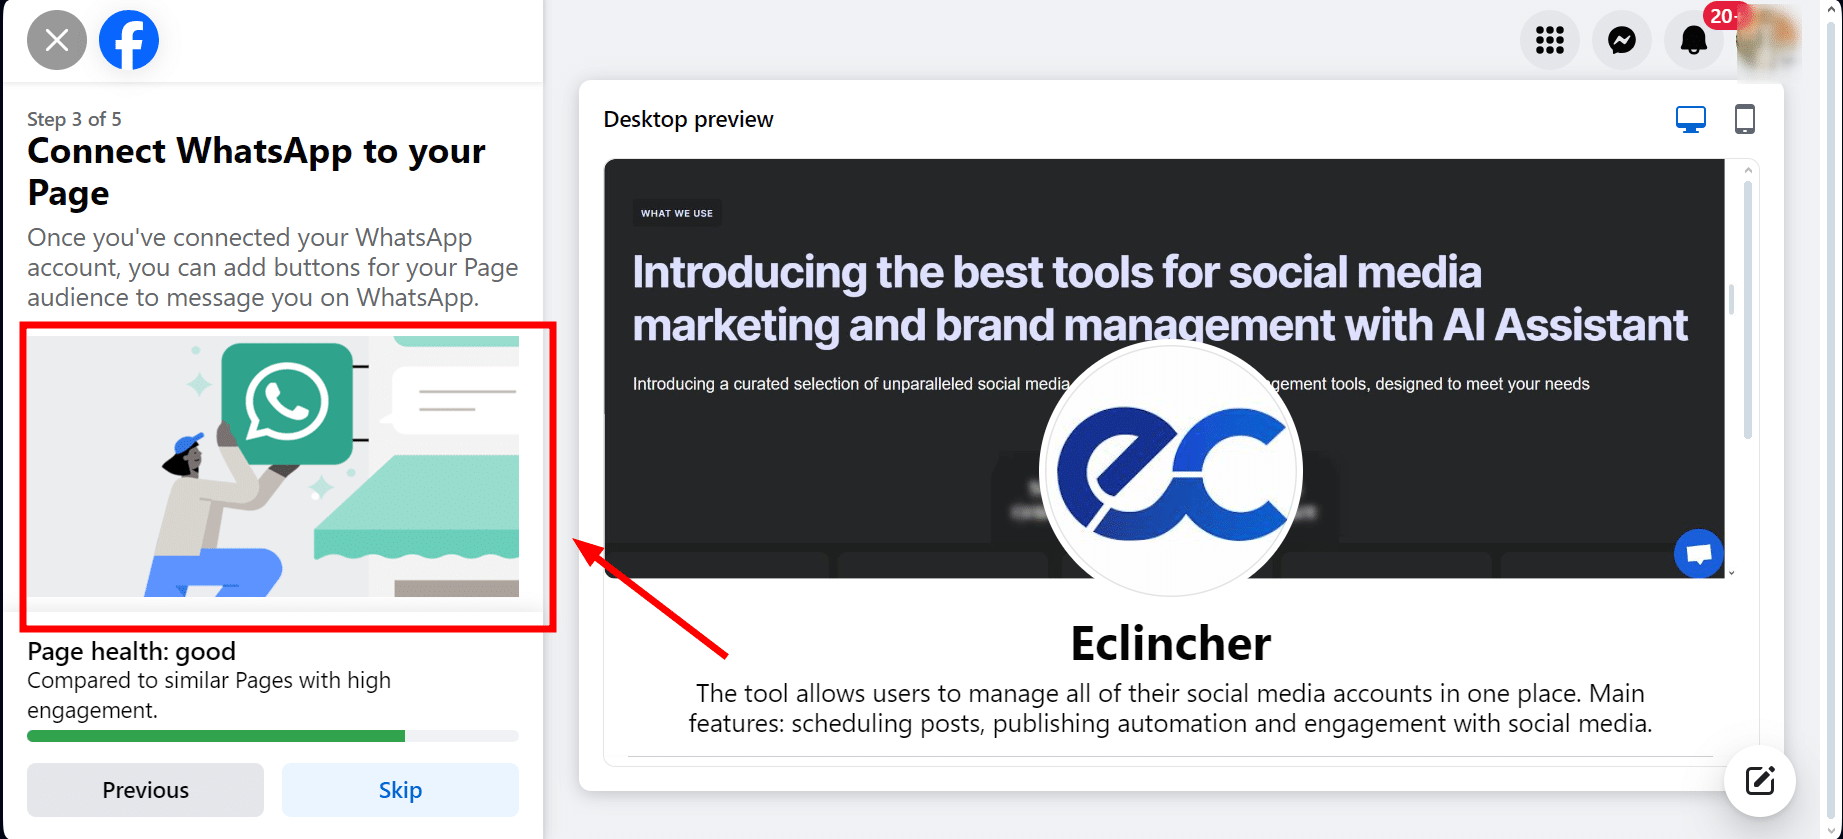
Step 5: Add WhatsApp and Invite Friends, and Notifications
After setting up the basics, Facebook will show you three more steps. You don't have to do these if you don't want to. If you prefer, just hit the "Skip" button at the bottom of each page.
- First, it'll ask if you want to connect your WhatsApp account. This is handy if you'd like customers to send you messages through WhatsApp.
- Next, you'll see options to invite your friends to like your new page. This can help you start building your audience.

- Lastly, it'll ask about your preferences for receiving notifications related to your page's activity.

Feel free to choose or skip any of these steps and click "Done."
Step 6: Put On The Finishing Touches
At this point, you're almost done creating your business page and ready to take a tour of your page and start churning out engaging posts. But before you create posts, we suggest a couple of last steps to polish off your new page.
Customize Your Tabs
To set up your tabs:
- Click on your page name at the top left of the screen.
- Select "More."
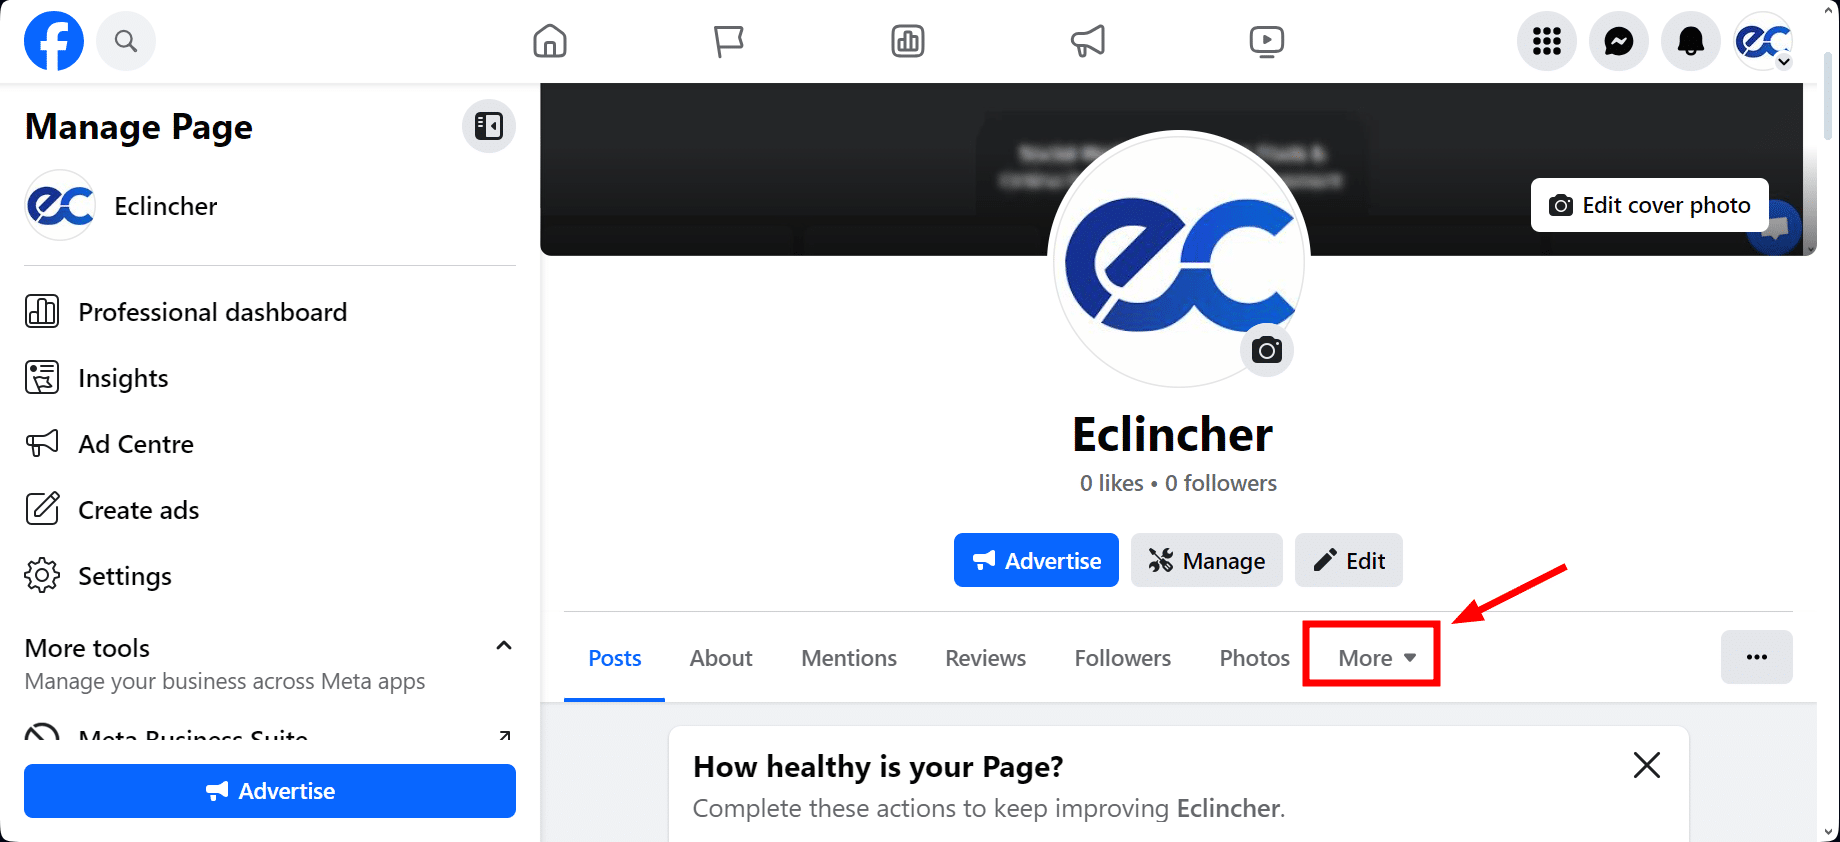
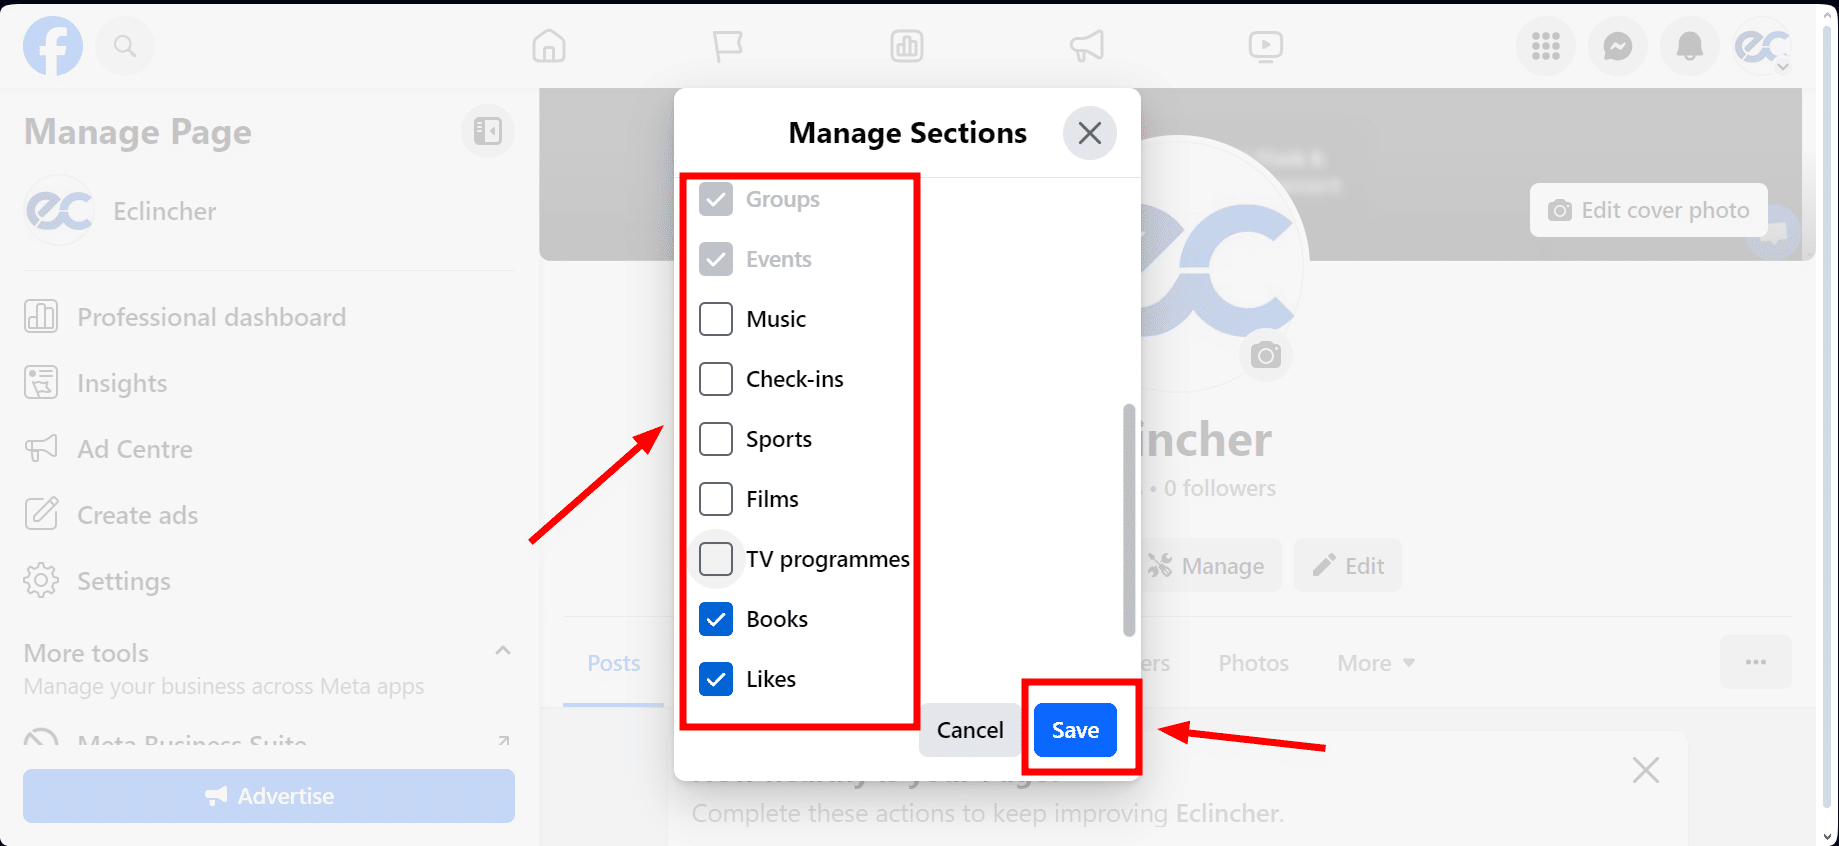
- Scroll down the prompt to the end and choose "Manage Sections."
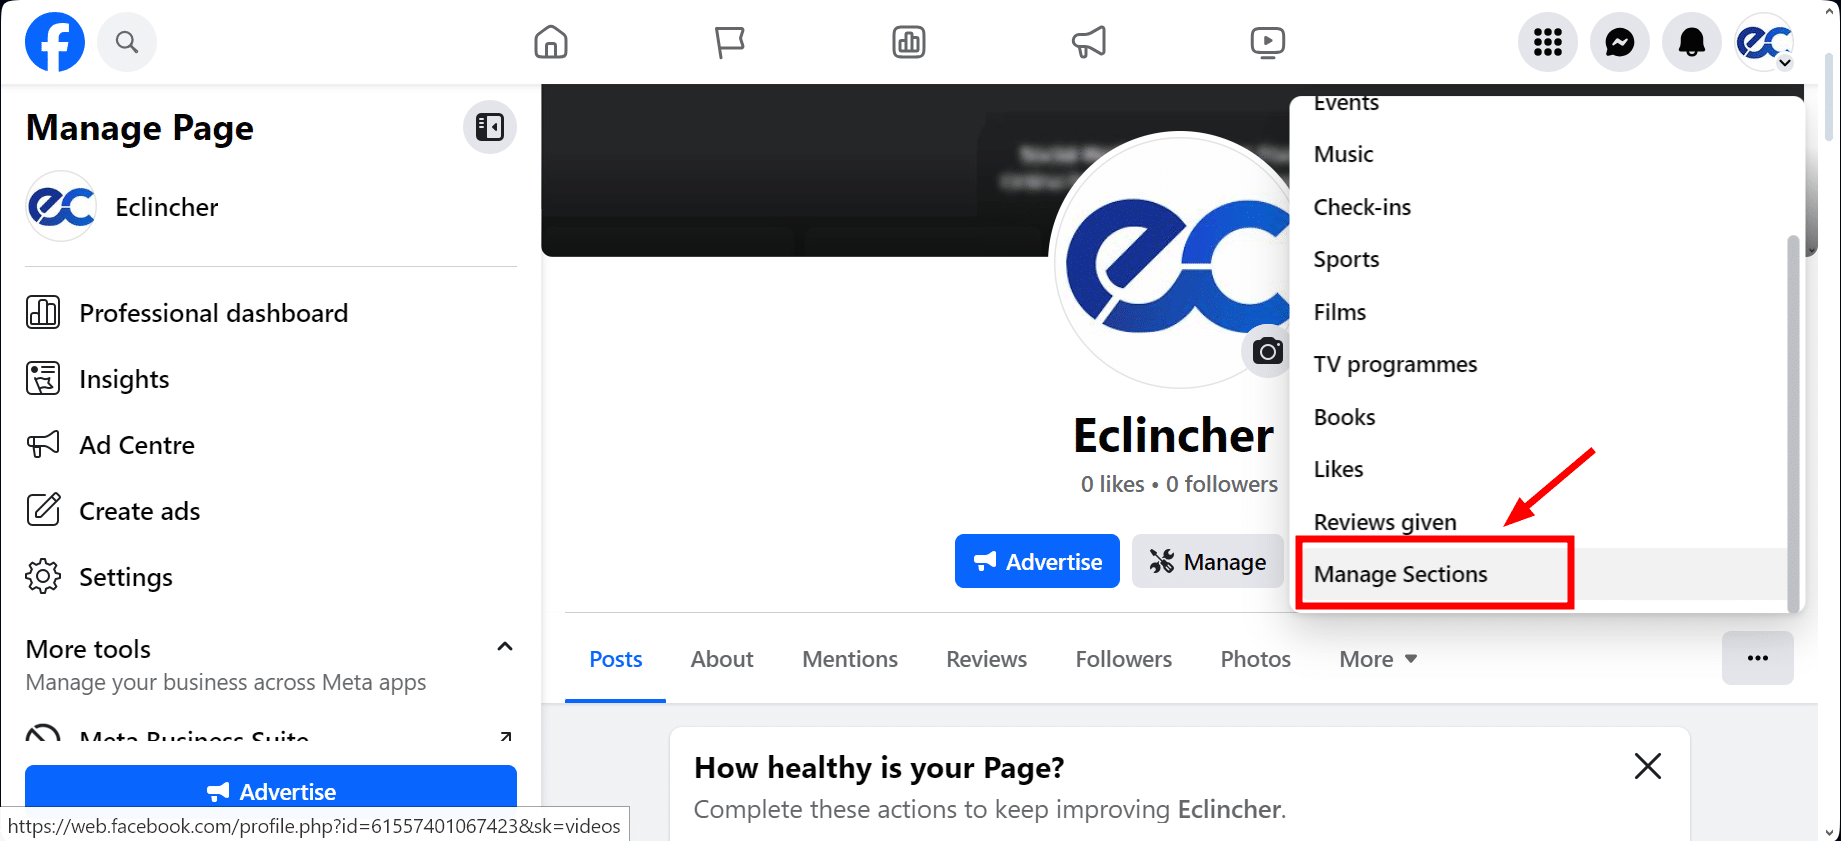
- Select the tabs that fit what your business does best. For example, you might want to show or hide reviews or uncheck tabs like "Music," "Sports," and "Check-ins" if they don't apply to your business. Remember to click "Save" when you're done.
Create a Custom URL
Having a custom URL makes your Facebook page look more professional. It's good for your customers to see a web address like facebook.com/yourbusiness instead of numbers.
Here's how to set your custom URL:
- Click on your "Page's profile picture" at the top right.
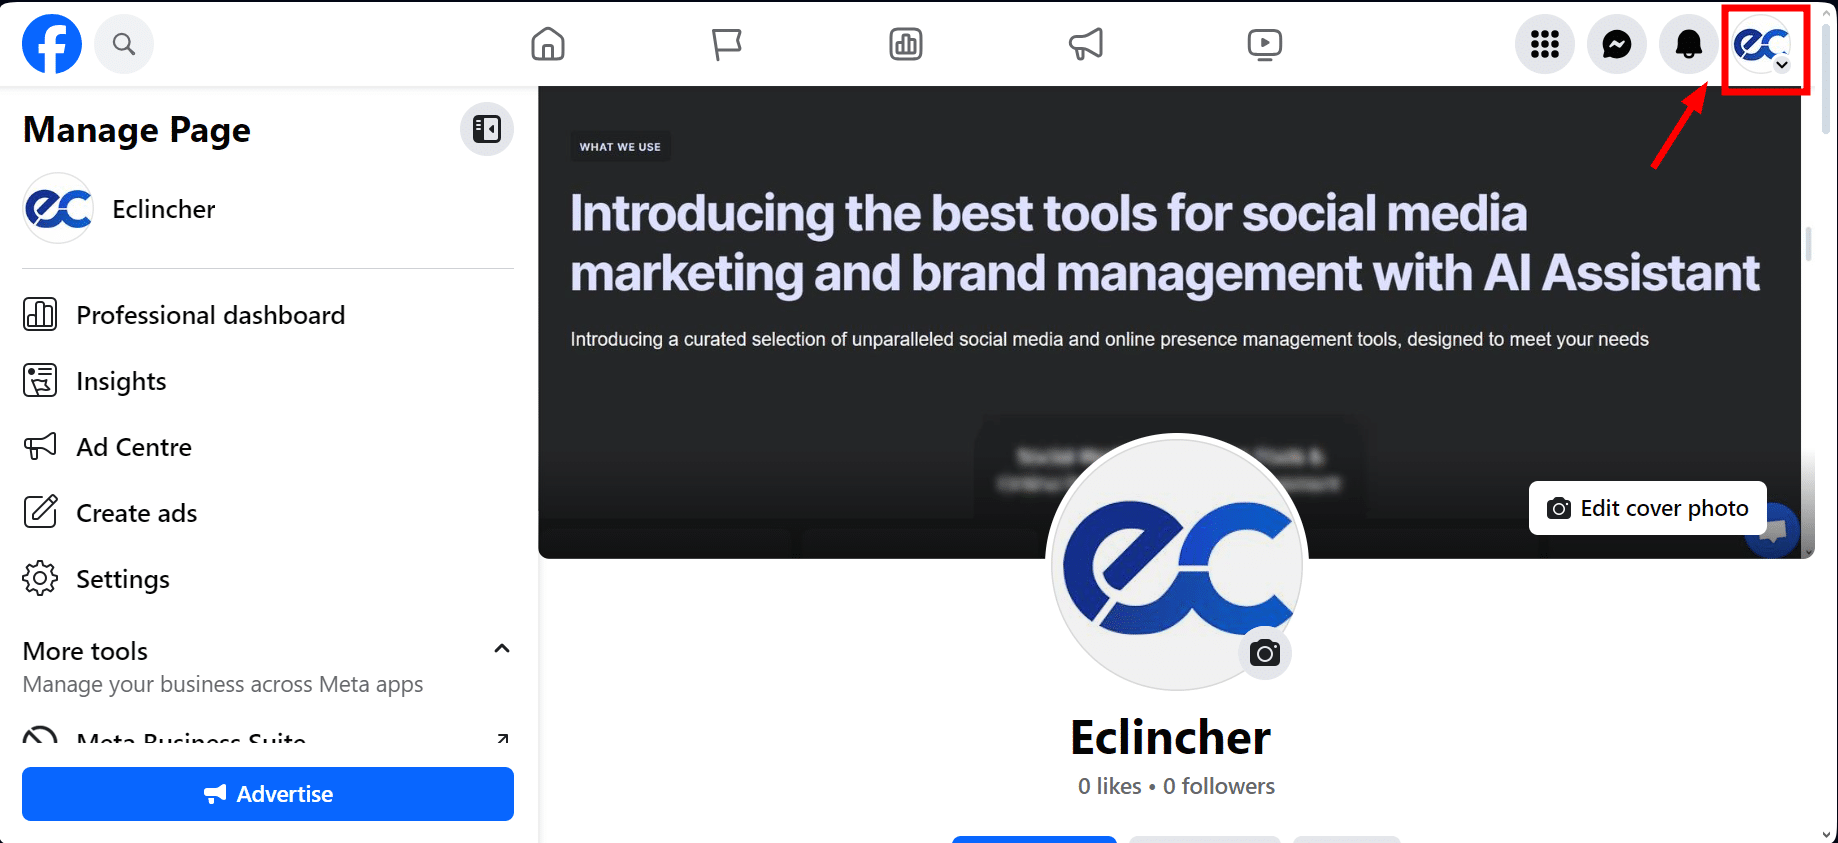
- Select "Settings & privacy."
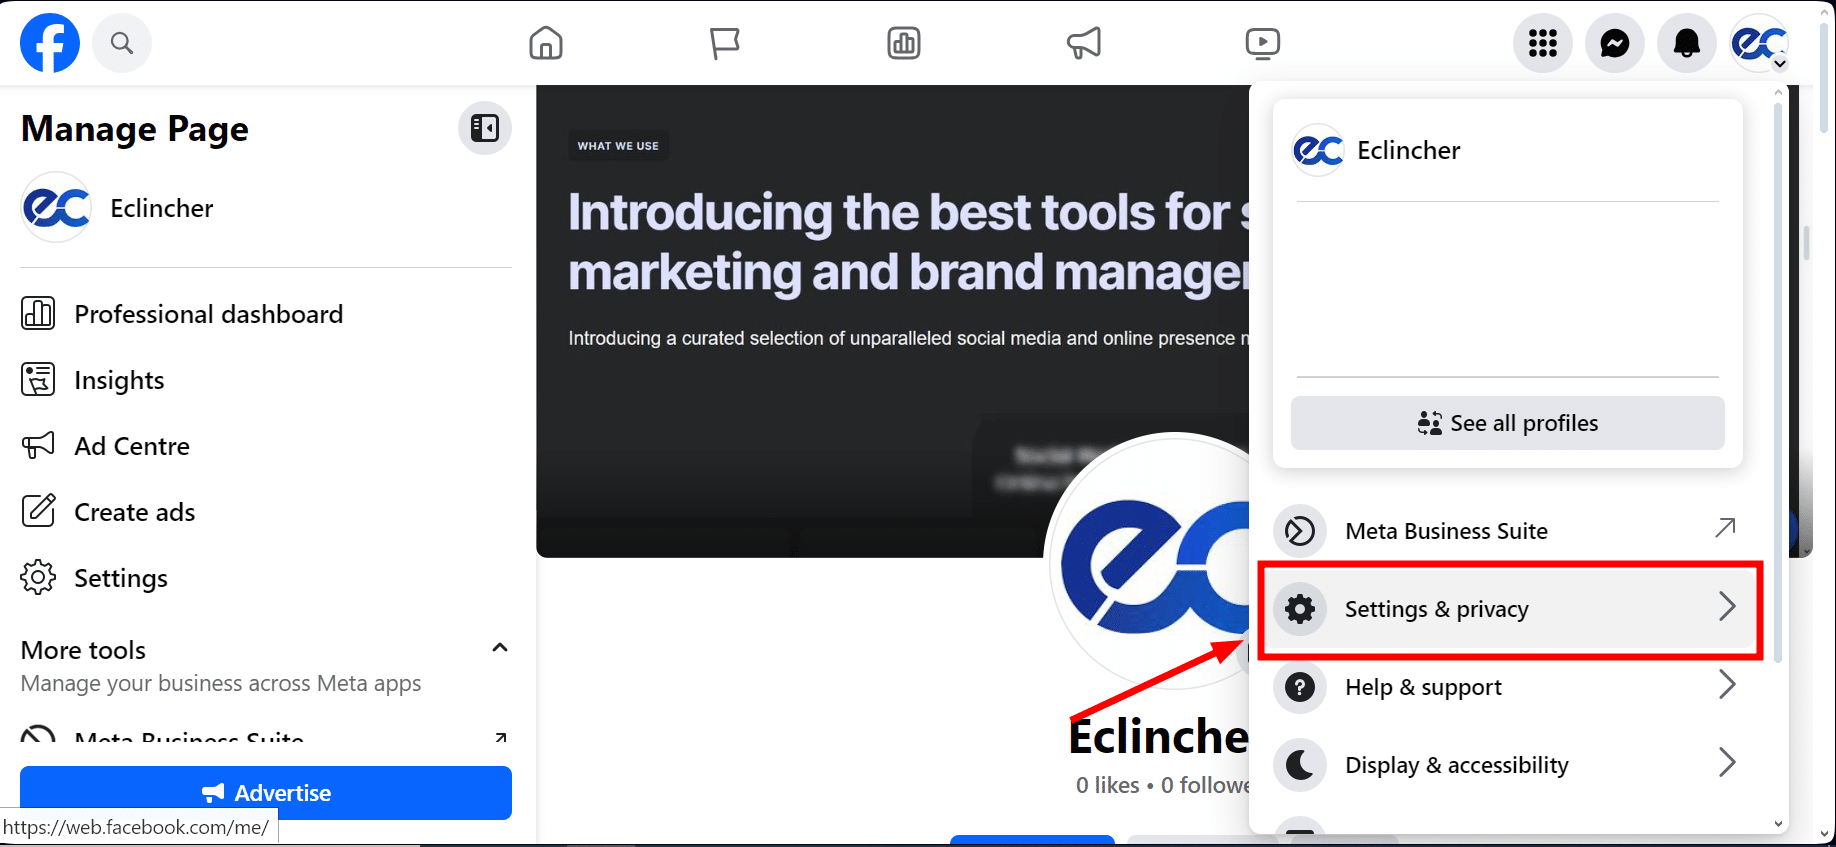
- Then go to "Settings."
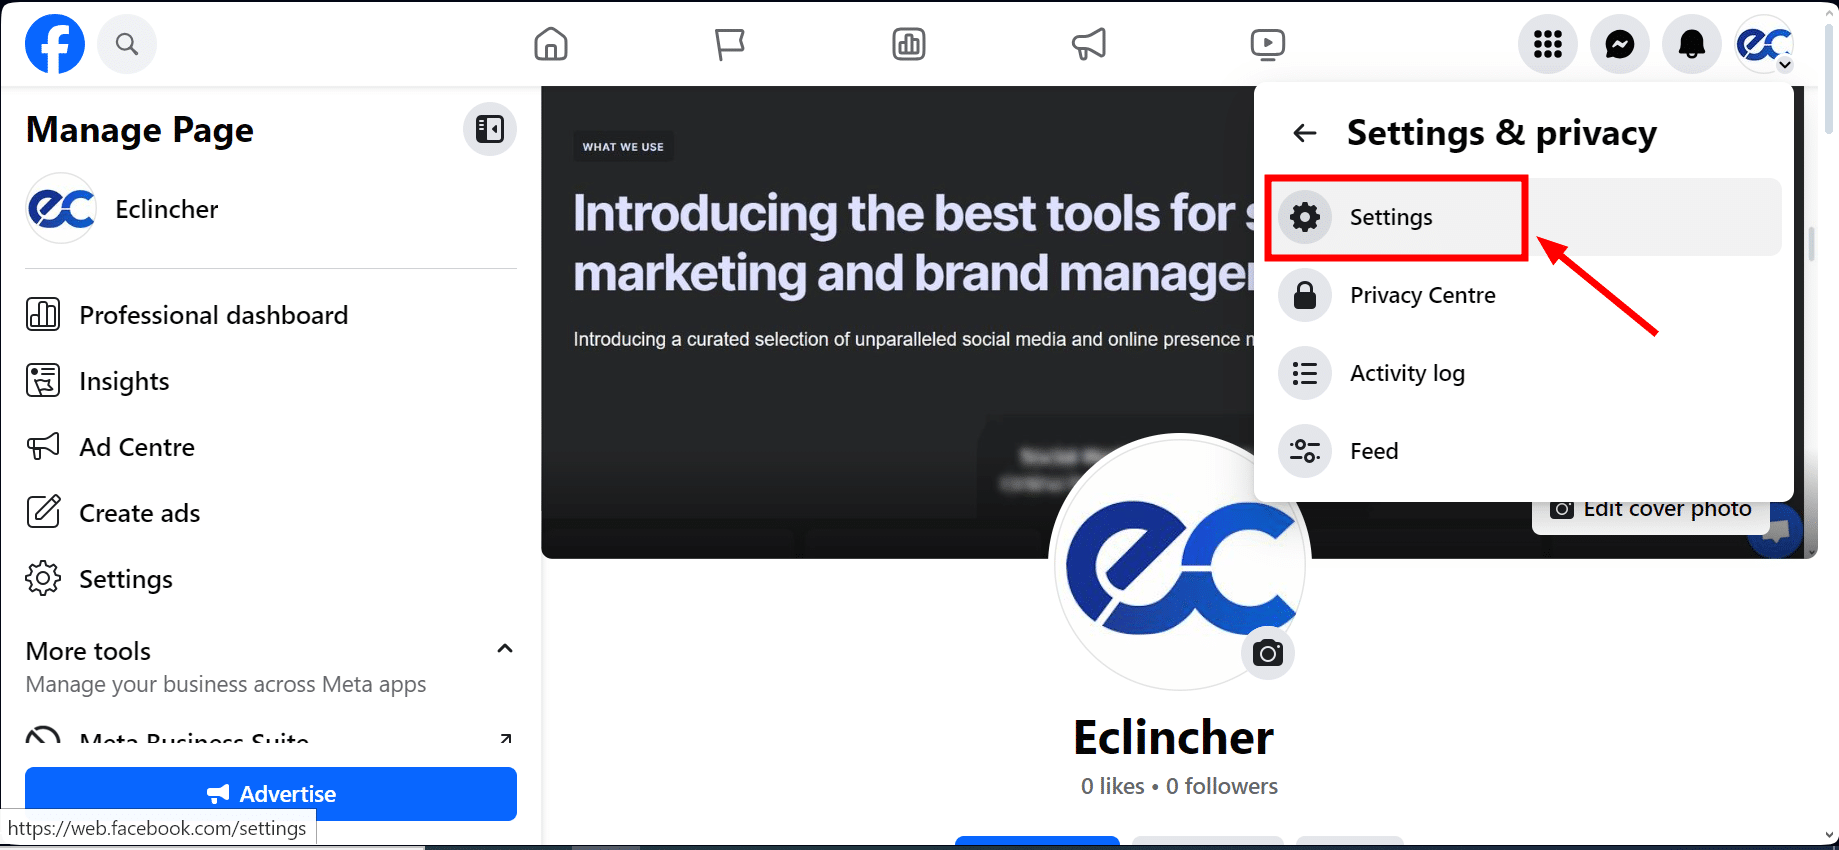
- On the new page, under "General Page settings," find "Username" and click "Edit."
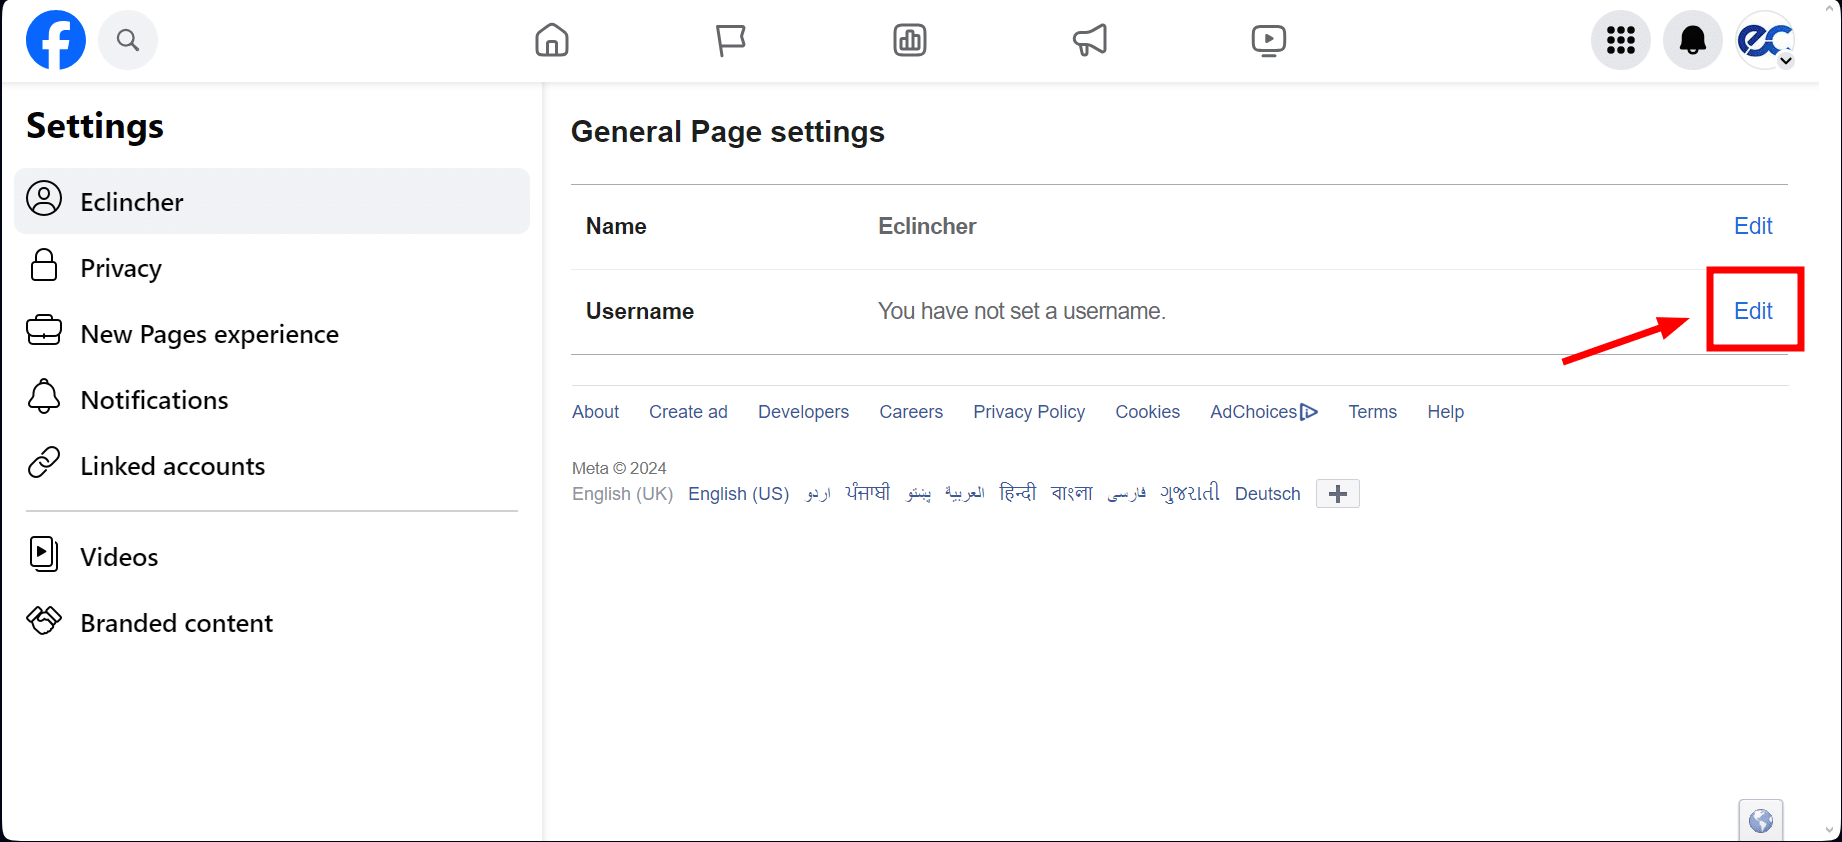
- Type in the username you'd like for your page. If your chosen username is available, hit "Save changes."

Note: If someone else has already taken the username or if it doesn't meet Facebook's rules, you'll have to think of another one. Follow the guidelines for choosing a username to make sure it's accepted.
Additional Set-Up Tips
Before you share your first post, add details about your business to your page.
1. Enter Upcoming Events
To list any events you're planning, hit the Professional Dashboard button on the left side of your page, click on Events, and then choose "Create Event" at the right of the page.
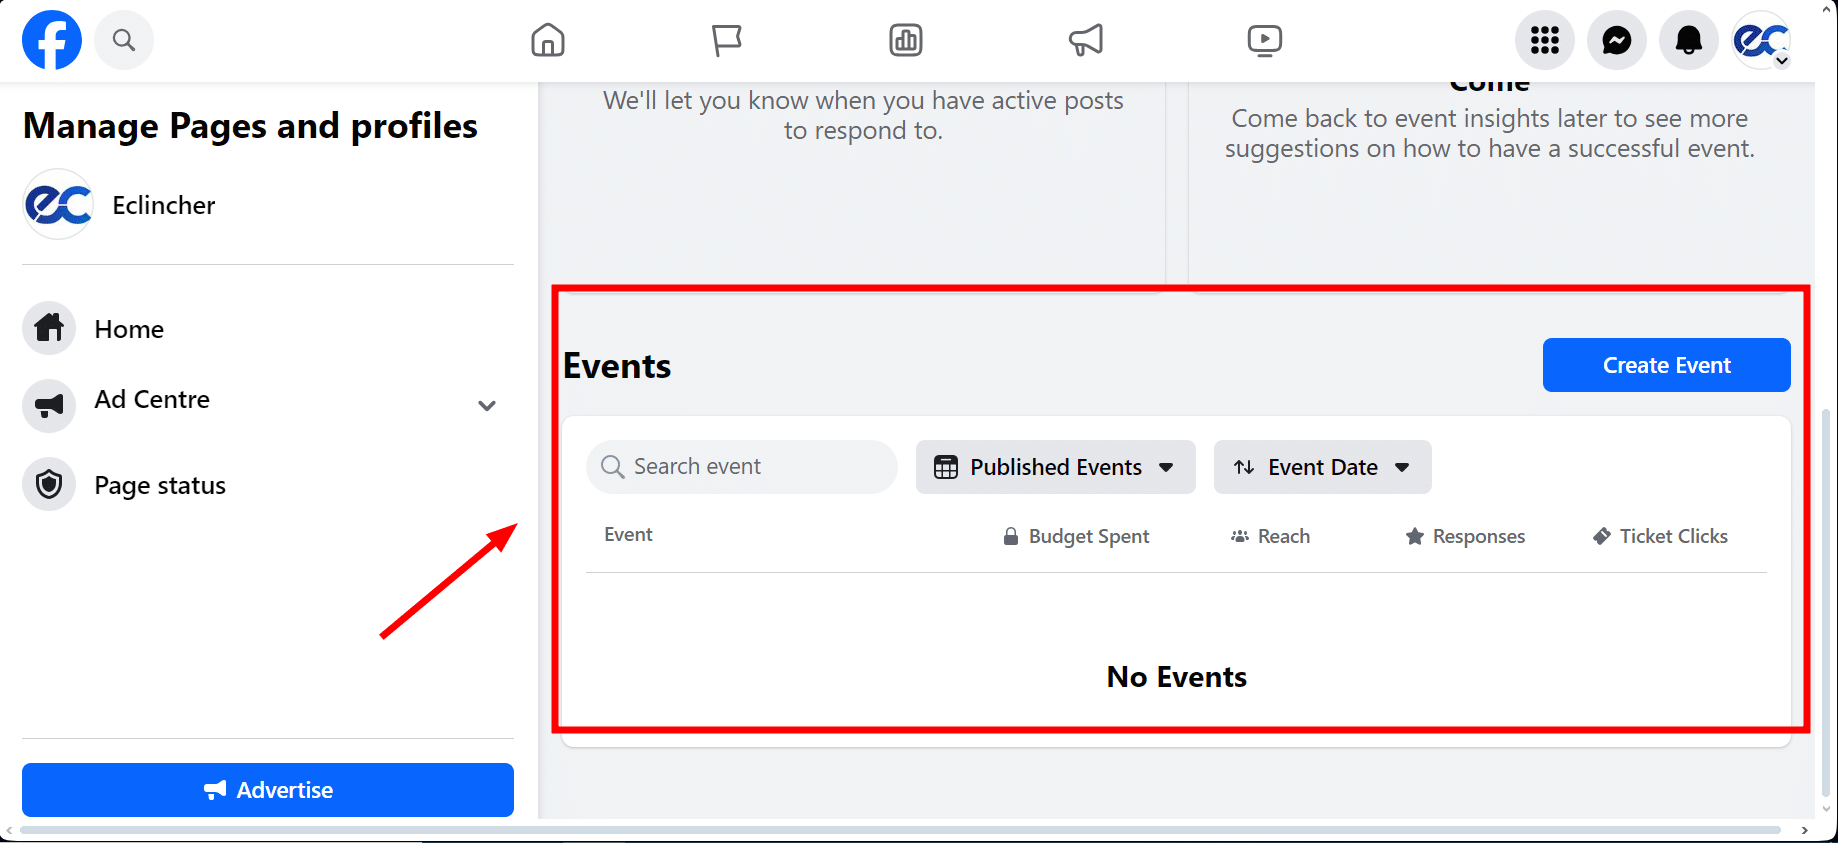
Quick Tip: Make it simple for people who like your page to learn about any events you're hosting. They can even click a button to tell you they're interested in coming.
2. Update the About Section
To update the About section, click the About tab right under your page's name at the top.
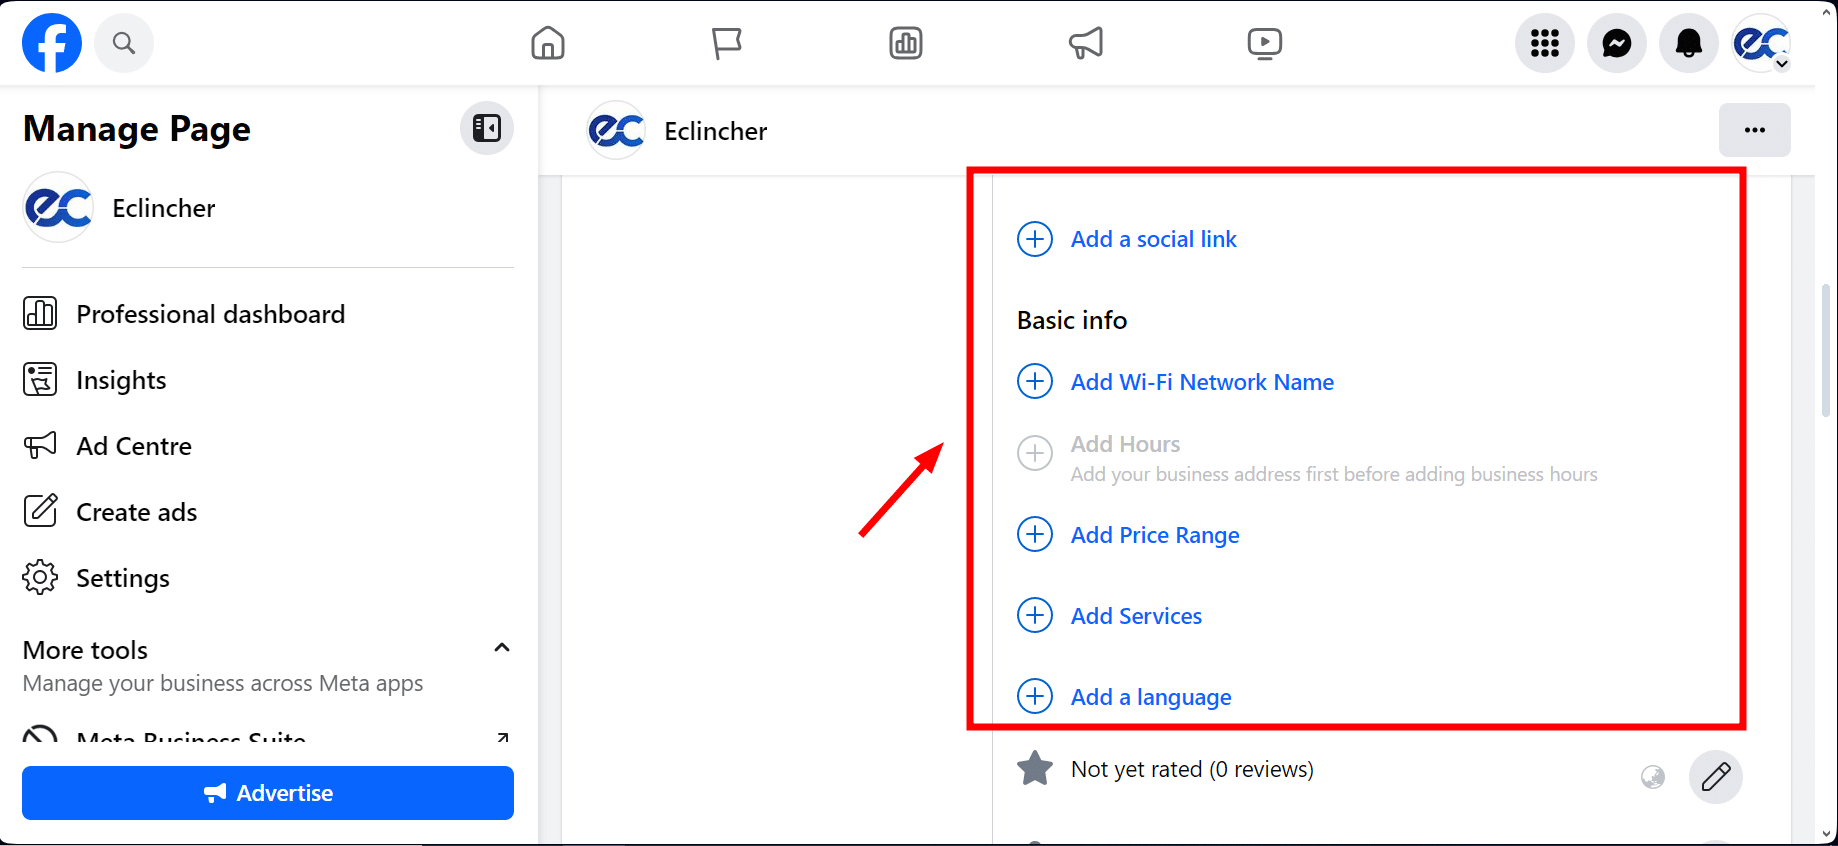
This area lets you share your location, what hours you're open, your prices, how to get in touch, and other useful info.
3. Add Page Roles
In the menu on the left, click Professional Dashboard, then find Page Access to let other team members or brand managers help manage the page.
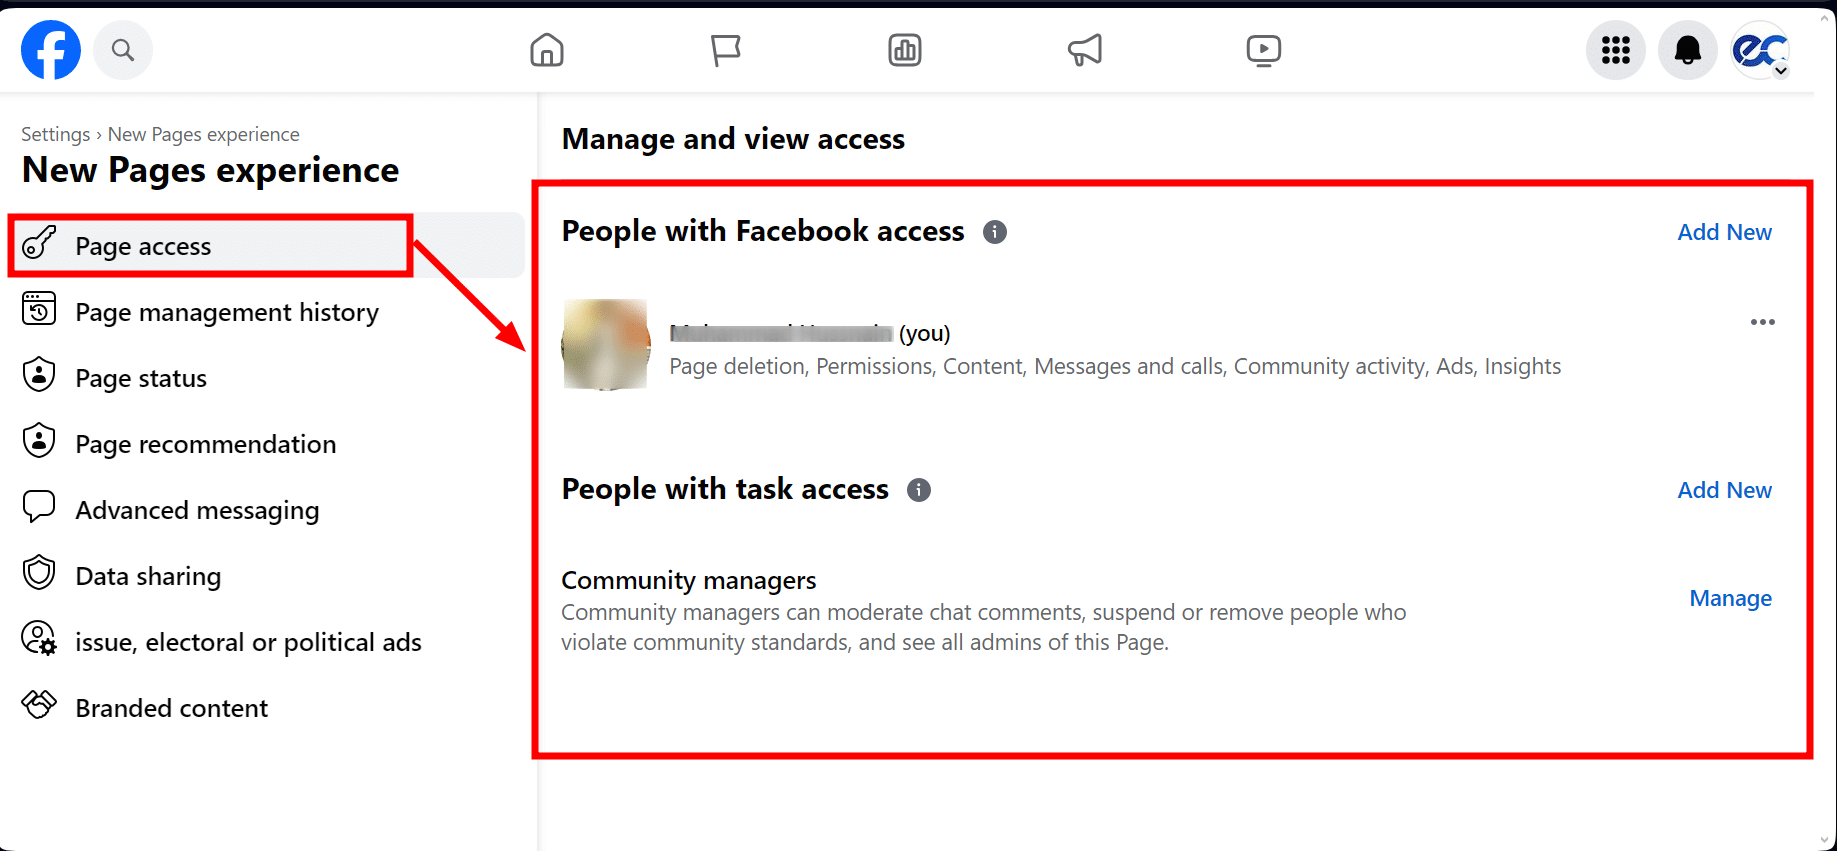
You have a few options for how to let others help out:
- Act as the Page: You can let them use the page on Facebook. If you don't give them full control, they can't delete the page or change who has access.

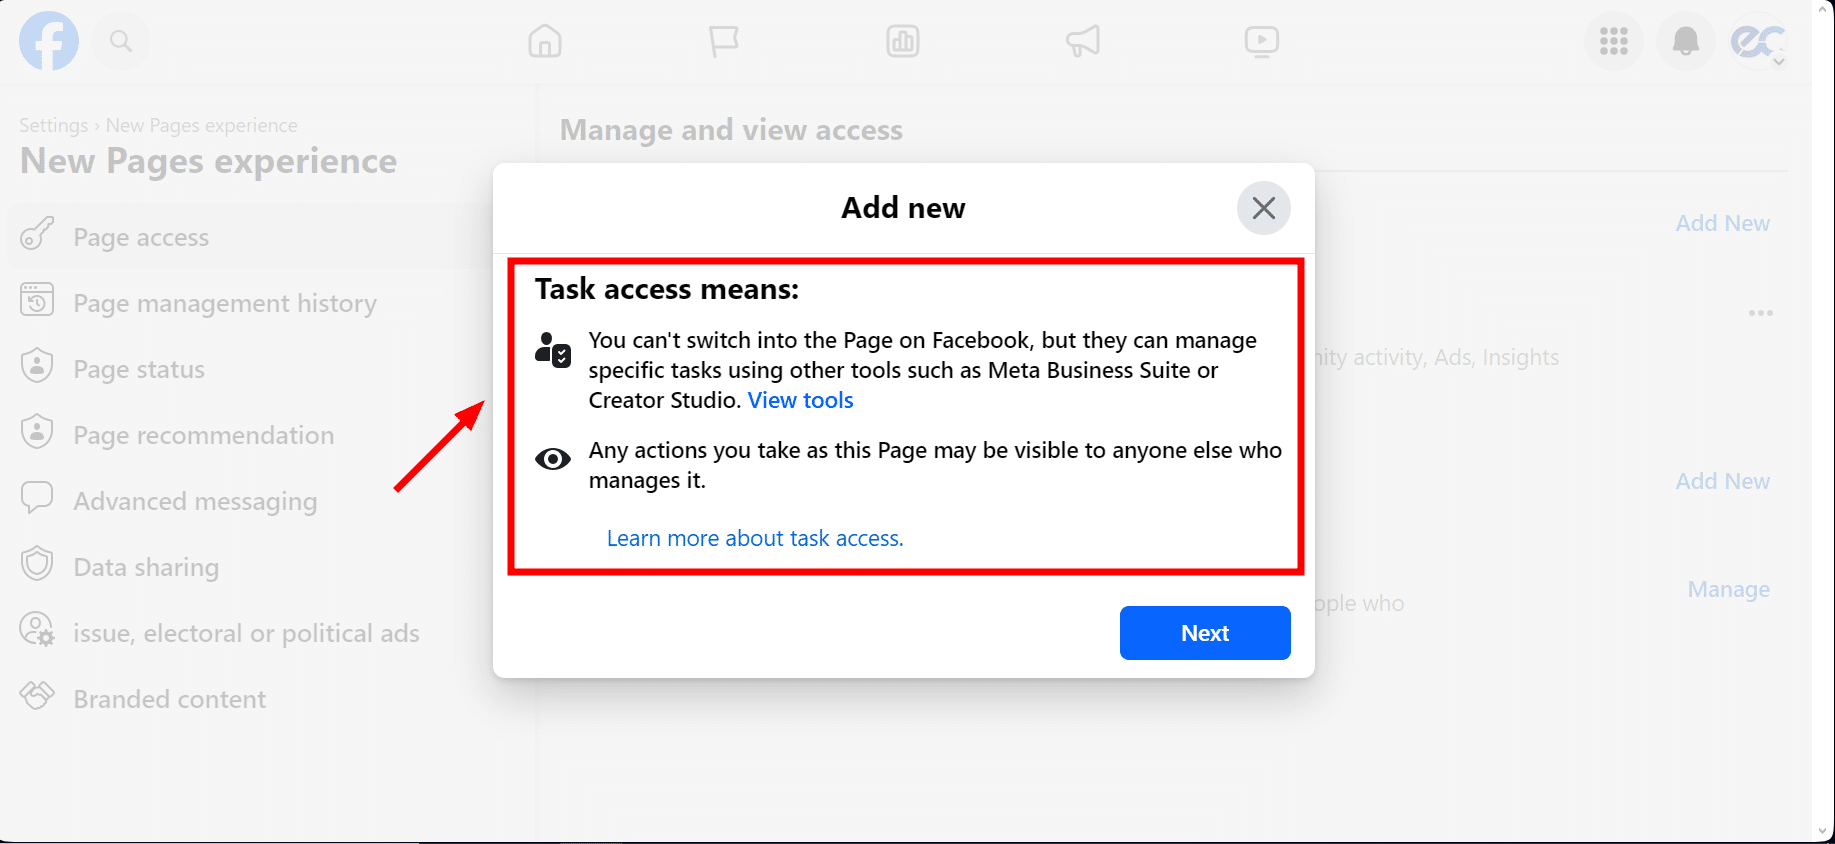
- Task Access: This option lets them handle specific jobs with other tools but doesn't let them use the page directly on Facebook.
- Community Manager: They can look after comments, put commenters on a timeout, or remove them if needed.
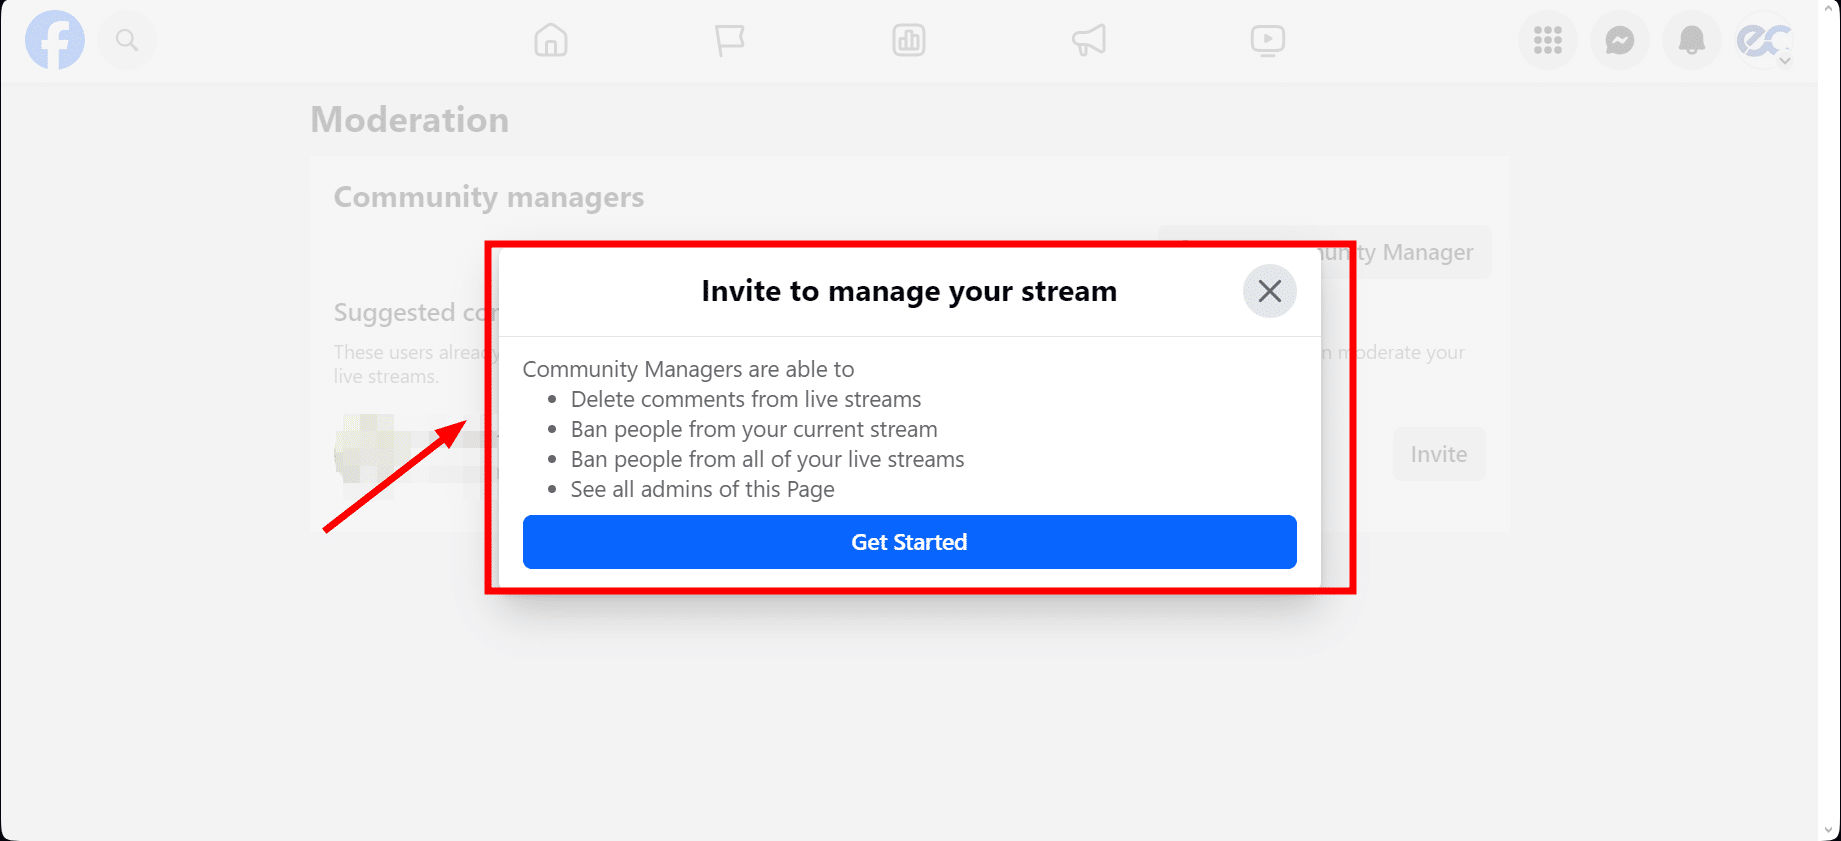
You can set these up by clicking Add New or Manage, then Next, and typing in the person's name or email.
4. Explore Your Page Insights

Making decisions based on data is smart. Your Facebook Business Page Insights offers a lot of helpful info about who's checking out your page, how much they're interacting, and how well your content is doing. Just click on "Professional Dashboard" on your Facebook Page.
- Inside, you'll find a dashboard with various tabs for information about your page. The "Overview" tab gives you a quick look at how your page has been doing in the past week, including how many people saw your posts, how many interacted with them, and how many new likes you got.
- The "Likes" tab tells you about the people who like your page, including their age, gender, and where they're from.
- The "Reach" tab counts how many people saw your posts on their News Feed or on your page.
- The "Engagement" tab shows how people interacted with your posts, such as how many reactions, comments, and shares your posts got.
You can also explore other tabs for more specifics, like how many people watched your videos or clicked on your website.
5. Get Facebook Reviews
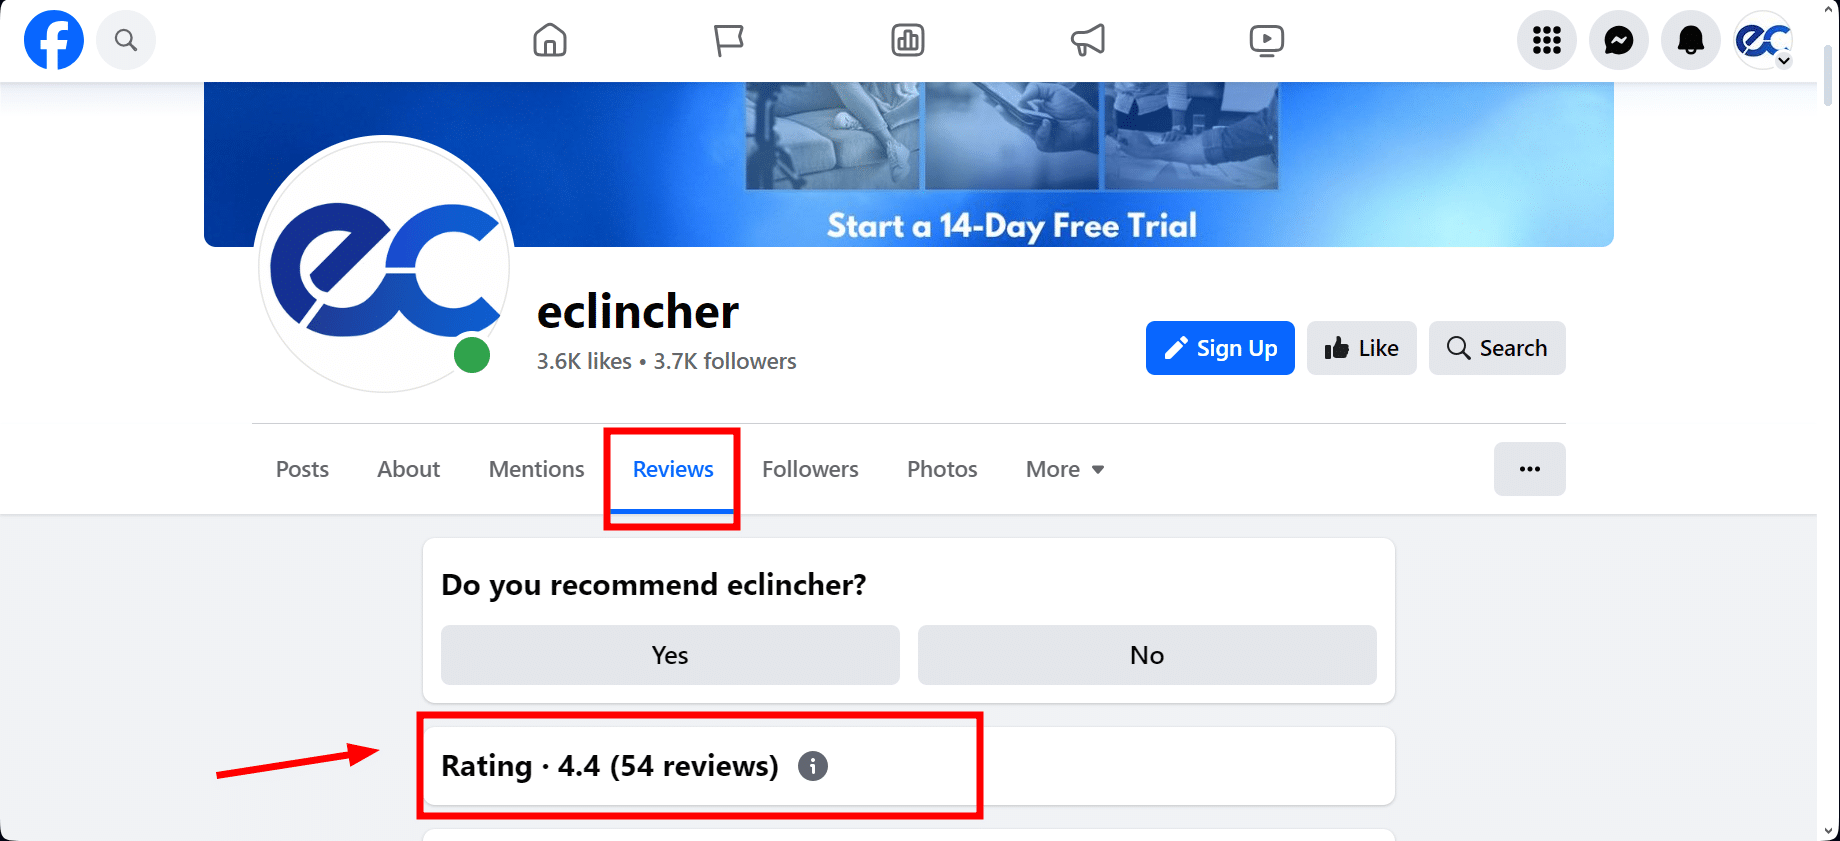
Nowadays, reviews are super important. They can help your business shine or bring it down. Taking time to get feedback from your customers is always worth it. Remember, the easier you make it for them to leave a review, the better. And buying reviews is not the way to go.
One last tip: Keep an eye out for fake or spammy reviews. Getting rid of these is important because they can look suspicious to new visitors checking out your page for the first time.
Conclusion
Creating a Facebook Business Page is a journey that involves several key steps, each critical to your page's success. From setting up your page with a personal profile and choosing the right name to customizing tabs and ensuring your About section is filled with helpful information, every step is a building block for your online presence.
Don't forget to add team members with specific roles, get into your Page Insights for more thoughtful strategies, and encourage customer reviews to boost credibility. Each step enhances your page's appeal and gears you up for effective marketing moves like running ads to target your ideal audience.
Frequently Asked Questions
Is a Facebook Business Page Free?
No, setting up a Facebook Business Page doesn't cost a thing. But, if you're looking to get your page in front of more eyes using ads or promotions, you'll need to spend some money.
How Often Should I Post On My Facebook Business Page?
Posting regularly is key to keeping your audience engaged. Aim for at least 3-4 times a week, but the ideal frequency can vary based on your business and audience. Monitoring your Page Insights can help you understand what works best for your followers.
Can I Sell Products Directly On My Facebook Business Page?
You can sell products directly on your Facebook Business Page by setting up a Facebook Shop. This feature allows your customers to browse and purchase your products without leaving Facebook.
Is It Possible To Run Ads Without A Facebook Business Page?
No, you need a Facebook Business Page to create and run ads on Facebook. The Page serves as the base for your advertising campaigns and provides a way to measure their success.


